Pikledbeats Dream Build

Status
Not open for further replies.
Re: Finally Ready For Dream Build ... Need Engine Suggestions

Thank you all for the great reviews. I got kinda caught up this weekend with picking up a new used car I've been trying to score. But got back to work yesterday so here's some more pics.

First is the bolt (was stock top shock bolt) turned down by 1bad442 to work with the yfz rear I scored from him.

28thli0.jpg


Although this was a great job I wanted to take up the slack as the shock has slack itself on it's own bushing and without spacers/bushings had more play then I felt comfortable with. I mimicked the bushings ken o'connor makes with by drilling out spacers to fit super snug over the bolt 442 already made.

2435jsl.jpg


And the finished product -

33udds3.jpg
 
Re: Finally Ready For Dream Build ... Need Engine Suggestions

At this point, I put my swingarm and axle into place. I really would have liked a diffrent brand swingarm, but at the time I bought it, it was 225 for a swingarm shop HD swing or 600 for an ASR. I wish they had been making T-Rock as it is in the middle and a bit beefier than this but I'm gonna roll with it and at 165 lbs don't think I'll be breaking it anytime soon. Oh it's a +3 Heavy Duty Swingarm Swinger.

kbvn7s.jpg


A couple more angles - And yes the axle is just hanging by top bolt which is in backwards (i've had to mock everything since getting back from PC everything is off by like a mm from buildup.

2vv98uf.jpg


344yykl.jpg
 
Re: Finally Ready For Dream Build ... Need Engine Suggestions

looking great man!! starting to wish i went with a red/black combo it looks gd!
 
Re: Finally Ready For Dream Build ... Need Engine Suggestions

Here's some randoms

Fender bracket -

2vn2qo9.jpg


Second, I had left a post in AWK';s build because the dumbass he had bought his frame from had drilled holes in the rails for skidplate, The kid who I got this frame from had done the same but in the frame gusset in rear. I did not weld them up because I do not feel that it has weakened frame and with the frame gusseted it should not be a problem. I am going back and forth about building some .190 brackets that use these for my skidplate but only if I can design them to so the pressure is not on frame. If not I will plug them.

2w4cxec.jpg
 
Re: Finally Ready For Dream Build ... Need Engine Suggestions

Thank you all for the great reviews. I got kinda caught up this weekend with picking up a new used car I've been trying to score. But got back to work yesterday so here's some more pics.

First is the bolt (was stock top shock bolt) turned down by 1bad442 to work with the yfz rear I scored from him.

28thli0.jpg


Although this was a great job I wanted to take up the slack as the shock has slack itself on it's own bushing and without spacers/bushings had more play then I felt comfortable with. I mimicked the bushings ken o'connor makes with by drilling out spacers to fit super snug over the bolt 442 already made.

2435jsl.jpg


And the finished product -

33udds3.jpg

Here's some randoms

Fender bracket -

2vn2qo9.jpg


Second, I had left a post in AWK';s build because the dumbass he had bought his frame from had drilled holes in the rails for skidplate, The kid who I got this frame from had done the same but in the frame gusset in rear. I did not weld them up because I do not feel that it has weakened frame and with the frame gusseted it should not be a problem. I am going back and forth about building some .190 brackets that use these for my skidplate but only if I can design them to so the pressure is not on frame. If not I will plug them.

2w4cxec.jpg


Nice fab job! I like what your doing! very great detail!
 
Re: Finally Ready For Dream Build ... Need Engine Suggestions

So with all the tolerance issues, I decided I was going to mock up everything for fitment then once it is all together I will go back through to threadlock all bolts.

My next concern was with the front brake cables. I started by measuring where my master cylinder would sit

r8rrep.jpg


I also have the matching clutch handle but if you can see in pic I need to change the adjustment screw out as it hits against the start/light switch currently -

9r0kki.jpg


The pro-taper mounts and tag bars raise where the grips sit over stock by about two inches, The top cable I'd ordered was a +3 speedlinez from ASR but actually just fit on this setup. I would suggest if anyone orders one they should order it two inches longer than needed to have adequate slack.

There is a hole for the stock line in the bracket where the hard line was routed, I stole a bushing from the stock heel guard and forced it over the cable and then into the hole so now the cable slides freely in stock hole to route without the metal edges catching the line and cutting at it which seemed would be the case when I first put it through the hole.

2iw59cp.jpg


Lastly, is the 2-1 line adapter, I am going to need to build a aluminium bracket here to raise it but still use this mount hole as the rubber boot at the end of the side lines does not fit under the new arms so I will run down the top of them. I have two sets of Alba line clamps Thinking I will use one set on bars for top cables Brake/clutch cable, The other set on the arms to route bottom lines to brakes.

24d083r.jpg
 
Last edited:
Re: Finally Ready For Dream Build ... Need Engine Suggestions

Next was making sure my peg/heel/combo with brackets etc all fit etc, also so I could set on rear fender to see how I'm gonna cut (yes thinking about cutting bottoms of my customs slightly but we'll get to that) first is just peg/brake pedal

okz5.jpg


There is some room between the peg mount and the actual aluminum nerf so I took some super thick vinyl tape and wrapped the mount to take up any slack. I also figured this might cut down a little vibration through the pegs ... Maybe, but it makes it all tight. It's weatherproof though so shouldn't break down quickly.

20qyhpv.jpg


Lastly, .... pegs/nerfs

2cwmm3o.jpg
 
Re: Finally Ready For Dream Build ... Need Engine Suggestions

Next was fitting the Raptor 125/250 GYTR REM Ballance edition Heels. This started with putting the other bracket I fabbed in the stock holes in back of nerfs/pegs - as shown before when I was fabbing them they lift the holes to mount the heels

2md5d2p.jpg


You can now see the brackets for both the peg and frame for heel

1z3z91c.jpg


With heel, you can notice the space between heel mount and bracket and I will get to that in next post

evdm60.jpg

t9uys8.jpg

w2no6.jpg
 
Last edited:
Re: Finally Ready For Dream Build ... Need Engine Suggestions

Now as mentioned above, I'll discuss the space, I had made some aluminium spacers, but then found some others that looked a little nicer pictured here -

keu99f.jpg


After mocking this I got another idea, I had a spare set of skateboard trucks sitting on my shelf and a little light bulb went off, next thing I knew I had pulled them apart and stole the hard polyurethane truck bushing that fit well, If I use this option I am going to buy some red ones at my local skate shop, but figured this would take up some vibration through the setup -

Pictured here -

142r2gm.jpg


What do you guys suggest, what do you think will work better and/or look better.
 
Re: Finally Ready For Dream Build ... Need Engine Suggestions

Ok, last for this morning ... My plastics have been sitting around collecting dust for months in my garage but I set them on here to see how the theme was coming together. I had to cut a tab out of the front fender to sit around the top shock mount gusset but it is not noticeable. My fenders need cleaned off but are essentially brand new (all except tank which you can see in avatar pic) don't let pic fool you. I do not like how the rears come in front of heel so some modding will be necessary but here's a sneak peak of the full color scheme. I also need to get my seat cover on it's looking ratty.

25qu4jm.jpg
 
Last edited:
Re: Finally Ready For Dream Build ... Need Engine Suggestions

the fenders are back off, gonna shine em up and save em to end, figurin out decals possibly etc., I don't really care for advertising for companies through stickers but might do some custom something like the blaster decals I made on tank. I don't even know if I'll keep those ...... anyway, gonna use my buddies press today to press-fit bearings in front hubs, once done I'll finally get it into a roller and get some more pics.

Anyone know why tinypic pictures disappear
 
Re: Finally Ready For Dream Build ... Need Engine Suggestions

very clean work! i like how you roll dude

keep up the good work and keep the pics coming. this is an awesome build im tuned in I:I
 
Re: Finally Ready For Dream Build ... Need Engine Suggestions

very clean work! i like how you roll dude

keep up the good work and keep the pics coming. this is an awesome build im tuned in I:I

Thanks alot man, I got a few of you tuned in.

I'm trying to figure out my rear fender today, I hate the way they are cut at the bottom and want to figure out a way to get them even and use the stock braces. I hate the look of them cut all the way up.

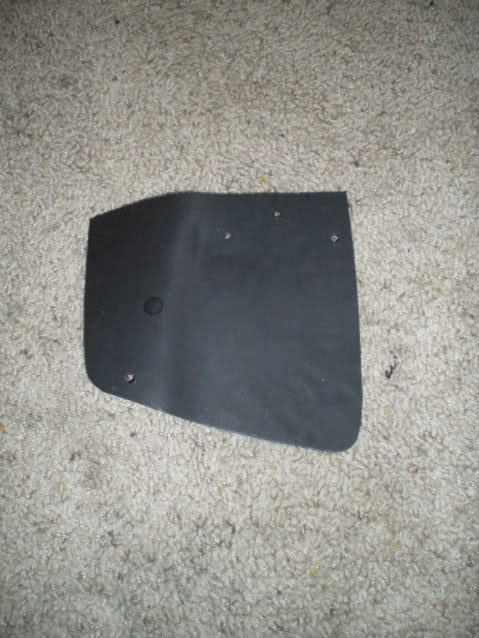
I started messing around today and using a heat gun was able to cut a peice that takes up the hole on left side (from front) who knows I'm tossing around ideas but here was my mock up fender flap.
15mz2v5.jpg

Just a mock up though, I was thinking if I did it with sheet aluminium and then matched it on both sides it would look symmetrical and would not wear as bad where my boots hit. regardless I have to figure out something cuz my boot catches under the edge of the cut out when I ride now.
I wish I had a pair of the crappy stock fender wells/heel guards to compare how it hangs
 
Re: Finally Ready For Dream Build ... Need Engine Suggestions

So I made this in like five minutes as a mock up but was thinking something like this on both sides so they match, who knows i'm tossing around ideas. Any suggestions would be helpful ....

14ui6v7.jpg


The angles look weird in the flash but there not quite right either, like I said mock up but if I could build a mold to bang these over I might start making a few I like it but need some opinions
 
Re: Finally Ready For Dream Build ... Need Engine Suggestions

So I got my studs in all my hubs, then pressed the bearings into my front hubs using a trick I learned here somewhere, taking the old bearing and sanding it down. Then I used that and a bearing press was super easy ....pics

2zjdfud.jpg

top pic shows real pc color (oranges under flash)
s0y3nk.jpg


I think I'm gonna use the stock ballons just to dial in my arms as they make measurement super easy and are the same size as my aftermarket tires.
I still havn't decided what I'm going to run.
I have a set of douglas .190 with kenda Klaws and a set of douglas .190 with kenda bear claws (pictured) I bought the latter for riding the mountain behind my house during rainy/snow as the trails are sh*t. They actually run here better than the Klaws which are way better in dry conditions.

255n9ja.jpg
 
Re: Finally Ready For Dream Build ... Need Engine Suggestions

Nasty beefy tires bro! hahaha thanks for the comment on my build...and nice work keep the pics coming.
 
Re: Finally Ready For Dream Build ... Need Engine Suggestions

So I got everything dialed in on the front end. Took a sh*tload of measurements with the ASR fronts and was able to dial it in almost perfect. Went with four degrees of positive camber and caster. 1/2 inch toe-in. I had to slightly adjust the front shock height to match the sag of the yfz rear when my weight was on bike. With the weight of myself and motor, I ended up with ten inches of clearance at the frame.

I'm curious where others choose to run the g-force axle spacers in rear with ASR fronts. I was looking at my buddies stock blaster and with his fronts flipped it looks like the fronts are roughly an inch shorter per side than the rears. If I use the small spacers on the g-force it looks close but am wondering what others have done. Just to get an idea.
 
Re: Finally Ready For Dream Build ... Need Engine Suggestions

I'm curious where others choose to run the g-force axle spacers in rear with ASR fronts. I was looking at my buddies stock blaster and with his fronts flipped it looks like the fronts are roughly an inch shorter per side than the rears. If I use the small spacers on the g-force it looks close but am wondering what others have done. Just to get an idea.

everythings looking fresh, great job with the colors. I:I I:I keep up the good work

with +0 +2 arms and my g-force axle i run the big spacer on the outside with just the smaller one inside,
the width is great for my tight trails with trees and such. it fits the front nicely this way i have
found, i think its 49" wide this way

you can see it here if i lost you..

icvfjn.jpg
 
Status
Not open for further replies.