So I got the jug off....

callmej75

New Member
Jul 12, 2009
832
18
0
Roanoke, VA
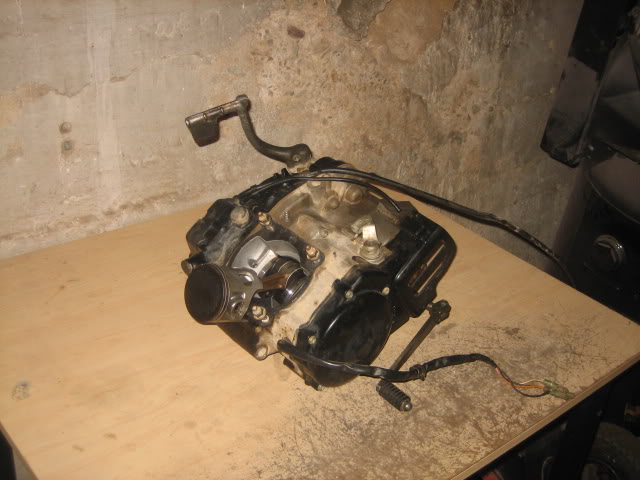
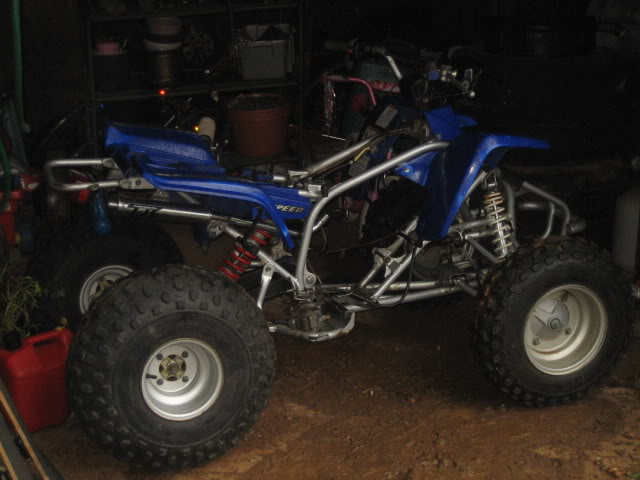
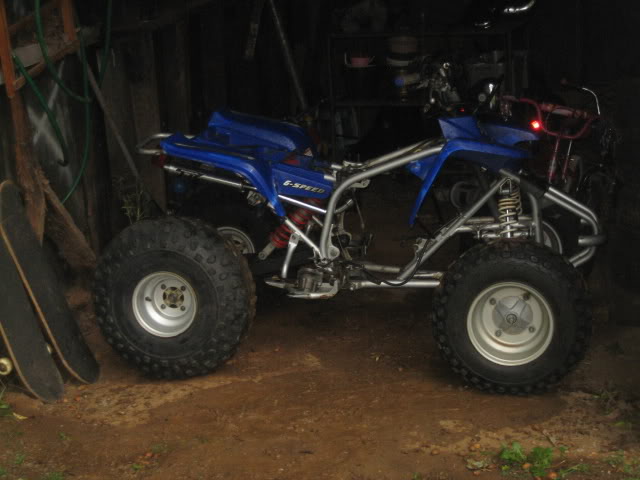
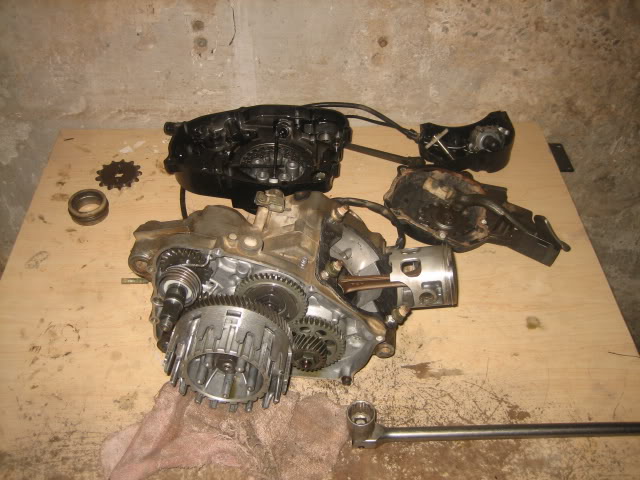
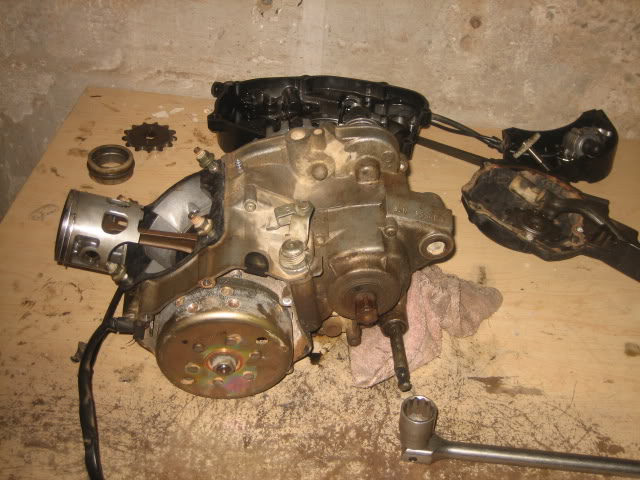
Is it me or does this crank look like it had a hot spot in it?

IMG_8607.jpg


IMG_8608.jpg


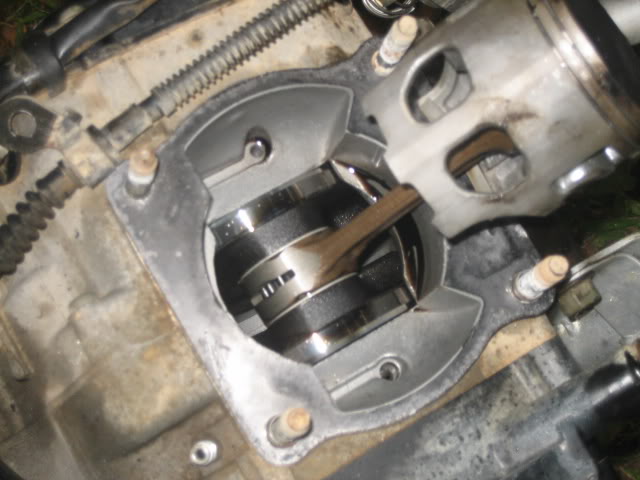
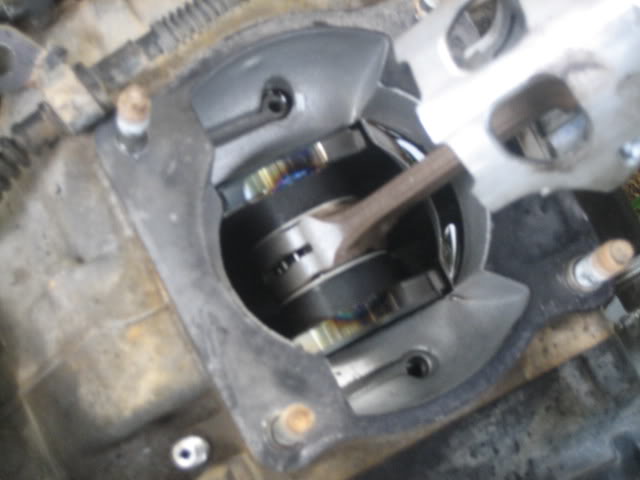
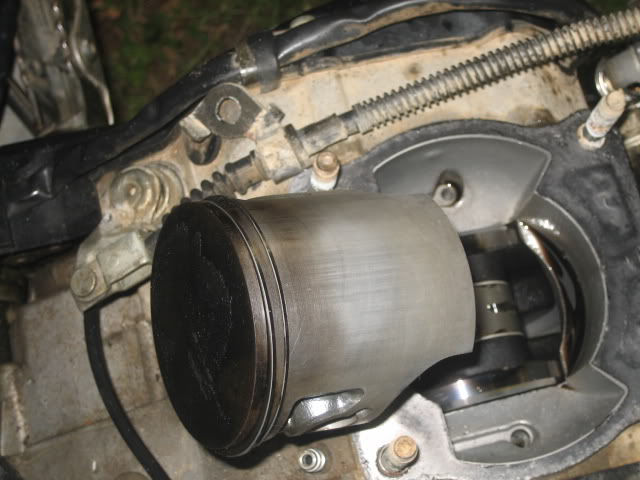
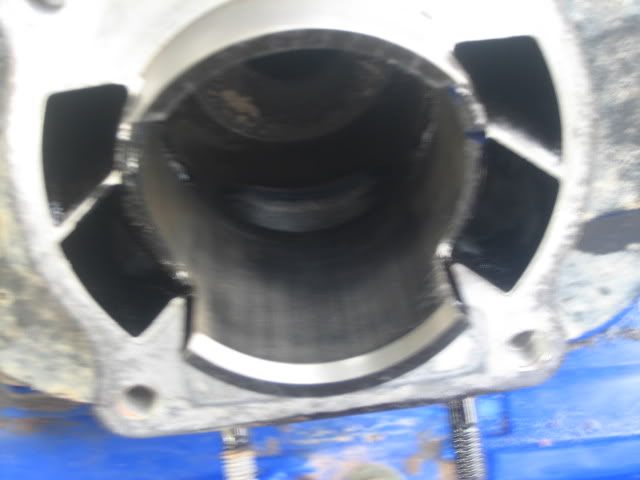
I also have some play in this con rod bearing....cylinder walls feel smooth tho?

IMG_8609.jpg


IMG_8615.jpg
 
it looks like a hot rods crank.. both my hot rods cranks looked like that my 4mill and std stroke.. your cylinder looks like it has normal wear it should clean up with a hone.
 
I'm gonna stroke it...not in the shower neither! 8-|

Gonna get some port work done and go up in CR. If I'm down this far, may as well do it good!
 
So I am looking at a stroker crank, porting and polishing, with an overbore of?

What would you guys recommend?

I know I am going with a wiseco piston setup and gonna need all necessary gaskets for this total rebuild.
 
So I am looking at a stroker crank, porting and polishing, with an overbore of?

What would you guys recommend?

I know I am going with a wiseco piston setup and gonna need all necessary gaskets for this total rebuild.

just go with the next size up,dont need to jump up to many sizes bc if something does happen again you wanna make sure theres enough room on the wall to bore again.
 
So after brainstorming....here is what i came up with:

240 Big Bore
porting
+3 stroker crank

Flotec's website had mentioned lightening of the piston and what not for cooling and better lubricating purposes?

Thats my plan....so what carb can I run with this setup to get optimum performance? Am i gonna hafta go with a better clutch setup?

These are my final conclusions....
 
Got any suggestions as to who to buy the cheapest Vito's stroker kit from? I can do that right now because i got some cash in paypal...cheapest one i saw was from Woodward and they offered up free shipping too on ebay.
 
So here she is....with the motor off. I am awaiting the tools completely tear down the motor and buy the top end and stroker crank

IMG_8642.jpg


I also got my +3 extended swingarm and 400EX shock mocked up on the rear...looks to lean or twist but nothing is tight...not ready to bolt everything on yet.

IMG_8641.jpg


IMG_8640.jpg


IMG_8639.jpg


IMG_8638.jpg


IMG_8637.jpg
 
So I got some apart...what i could yesterday. Waiting on the MAg tool and clutch tool to remove them. Plus the case splitter and crank puller as well.

IMG_8644.jpg


IMG_8645.jpg


I know I am eliminating the oil pump and putting the block off kit on there while I'm in there. Getting rid of the pump and adding the plate.

What do you guys think....buy the ricky stator 75 watt with adjustable timing, or just an adjustable timing cover?

I deal with building high performance engines...but 2 strokes I'm not sure about. Any help is appreciated! I'll also take alot of pics along the way...maybe a vid or 2 of splitting the case and pulling the crank.
 
looks good man..there are ways to split the case and take off the basket with homemade tools,but since ur getting them thats good,since ull have them or any other builds. Pics and Vids deff help,Take a Vid of splitting the case and pulling/installing the crank and bearings and post it up in the DIY.
 
looks good man..there are ways to split the case and take off the basket with homemade tools,but since ur getting them thats good,since ull have them or any other builds. Pics and Vids deff help,Take a Vid of splitting the case and pulling/installing the crank and bearings and post it up in the DIY.

Yeh I gotta rubber mallet....but I always f*$& something up when I beat on stuff! Plus I like doing things the simple way....getting older definitely has it's weaknesses! LOL

I surely will do the vids of splitting the case and the crank pull and install.

I just tried taking this oil filter holder I got that has teeth on it to hold the clutch basket just to try it...and it started to slip and score the basket so i just stopped there. I am inpatient as hell...but I want this done right with no defects.

Just measured my clutch springs with a caliper and they measured out at 34mm so they are still good to go.

I will do the vids sometime this week with the pics in the DIY section this week when the tools arrive.

Plus I gotta figure out this wiring on the TORS thing since it will be totally eliminated, along with the oil sending unit wiring so it will at least fire up without sensing there is no oil in it when it will be premixed already.

I saw a vid of heating the case up with a propane torch just enough to make water boil on it and leaving the bearings in dry ice so they will just slip right in and expand once it gets to room temp.

well there a DIY about removing the TORS and it has pics and takes maybe 10mins. As far as the oil wires..i just cut them shor and capped then and covered them with wire shrink wrap. Easy as pie.lol
 
well there a DIY about removing the TORS and it has pics and takes maybe 10mins. As far as the oil wires..i just cut them shor and capped then and covered them with wire shrink wrap. Easy as pie.lol

I'll search for that TORS link....I guess I'll but those wires going to the oil sending unit and see how that goes. Where do the actual wires lead to? Maybe get to the source of the problem and eliminate altogether and that annoying oil light in the headlamp! I:I

I noticed there is not much electricals to these Blasters...and the ones from the stator I unhooked are color coded so no need for marking! Thats good stuff there...