DIMWIT parts

Hey Otis, Just drank that home oak brew, damn, that was a strong dark (guinness style)brew. can only get one of those down a day! Back to my lighter side now! No brewing for me, That's like porting, I'll leave that to the experts!

BTW- Nice shock setup!

Not big on the heavy dark beers myself. I like light, easy drinkin brew that can be consumed in quantity :) It ain't a high tech hobby, experts, whatever they are, tell me the solution to any brewing problem is to open another home brew & don't worry ... LOL ... burp
 
Not big on the heavy dark beers myself. I like light, easy drinkin brew that can be consumed in quantity :) It ain't a high tech hobby, experts, whatever they are, tell me the solution to any brewing problem is to open another home brew & don't worry ... LOL ... burp

Great advice! BTW- if ya want it for practice, I think I still have the rear spring off the stock blasty shock!
 
Thanks for the kind offer but I don't think Blaster springs have much potential.. I've got a couple 400 springs just about where I want them for our 2 Blasters. Both have 10+ in. of travel but are very different. If I had a few more I could go too far and learn where that point is. The yfz's have to wait till the front suspension layout is completely defined. It's been in a state of tack & check & change my mind for some time. Almost satisfied. I'm a little nervous about grinding my only 2 yfz springs ... lol
 
You do some damn top notch work, really creative and just differeant i dont think anyone else on the forum with your machinary could or would do some of this stuff. Your bike is a mix of old and new school i love it.
 
Was swappin hand me down parts from the yz blaster to the guest blaster and found .010" - .015" play in the tie-rod ends. Don't seem like much but it adds up to a lot of play through out the front end geometry. In a perfect world I'd just buy new ones, but that's not my world. Chose sockets that matched the original crimp locations, put a good load on them in a vise and a few whacks with the trusty old hammer. Don't wanna crush'em, just compress the plastic liner a bit. Now I got used, but smooth & firm ball joints with no play. Have to be careful with the boot but it's a good time to put some fresh grease in there. Just passin on another intoxicated Otis Idea ... burp
~
t-rodendpinch1a.jpg

~
can see the ring from the socket
~
t-rodendpinch1b.jpg

Amazing what a hammer and a ten pack can do! Nice job!
 
I too have used this method of refurbishing tie rod ends and A arm ball joints, but I find that clamping the vice down and striking the moving jaw of the vice seems to work better.
 
I too have used this method of refurbishing tie rod ends and A arm ball joints, but I find that clamping the vice down and striking the moving jaw of the vice seems to work better.

Good point & true ... these are small parts & only need a little nudge. Thought I'd have more control this way.
 
Nope, been lazy bout fab work. Been playin with the electrical stuff. Figuring out mounts for battery, regulator/rectifier, brake light switches, cooling fan, lights & such.. Like to put the battery weight under the steering stem but maintenance access and waterproofing makes it tricky. Still tinkering with a programmable trigger to strobe the flywheel & clutch. Have to rewind the stator and make up a new wiring harness. Seems I go backwards more than forward but the fun is in the doing and I'm in no hurry :)
 
Still pluggin along ... pipe fitting ... I just love hackin up pipes ... LOL ... I think I have enough clearance so I can use either the YZ or Ohlins jug. The taller Ohlins jug kinda complicated things
.
BTW: This isn't just random hacking, I'm tryin to build a better pipe for my application from a few good production pipes but still follow the frame lines & look decent
~
pipefit1a.jpg


(SOME CUT)

Great minds think alike, fools seldom differ...:

199410_10150167877235803_549110802_8741706_120228_n.jpg


This was a 3" header flange and I am also working with the idea of using it to swap pipes or add a length to the pipe.
The initial idea was just to be able to fit the pipe without cutting the frame.
 
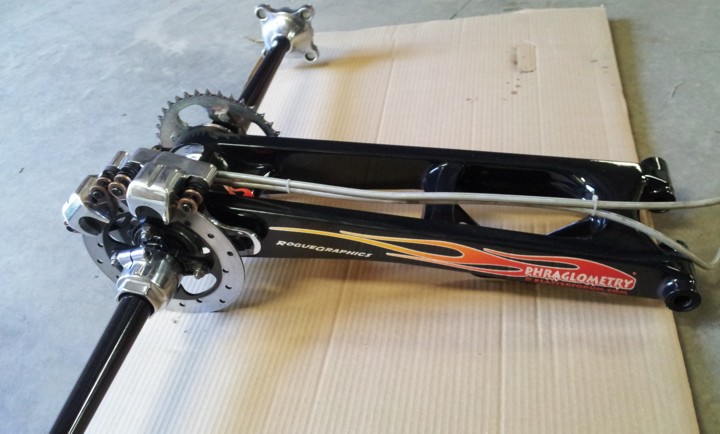
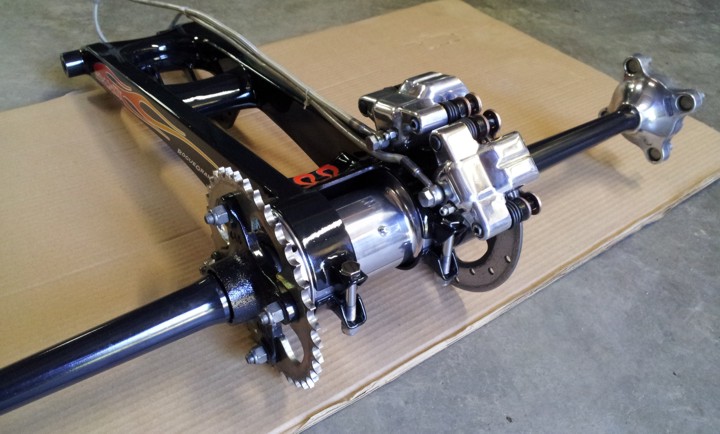
A few more parts .. aluminum caliper mount, modded caliper bracket and a delrin wear bushing ... shined on sum eBay parts & checked fit
~
caliperparts.jpg

~
swingerassmbly1a.jpg

~
swingerassmbly1b.jpg