Another homemade swingarm
- Thread starter YZ Otis
- Start date
You are using an out of date browser. It may not display this or other websites correctly.
You should upgrade or use an alternative browser.
You should upgrade or use an alternative browser.
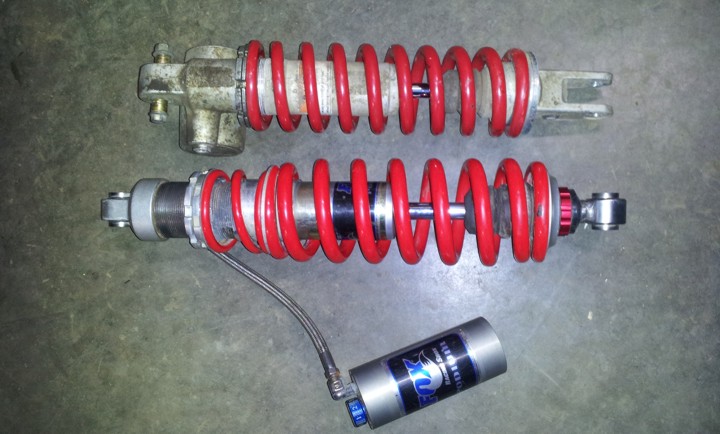
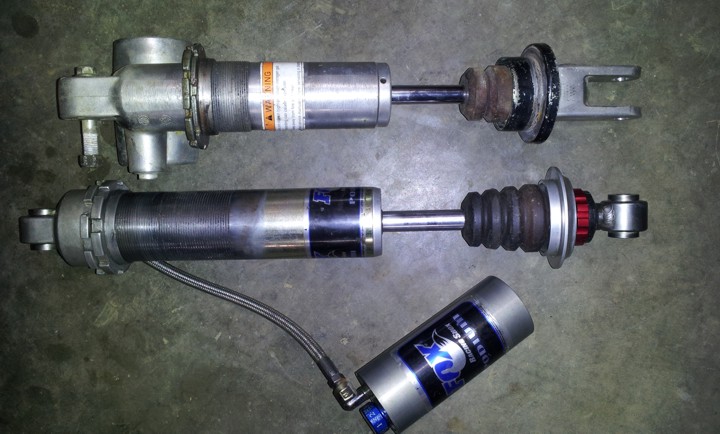
Here's where I'm going with the new swing arm ... won't do anyone much good cuz the shock is 2" longer and requires a new top mount location ... no big deal on my butchered frame and no more work than building the swingarm  ... This Fox dual rate was made for a swingarm like the Blaster with no link so it has a nice bushed eye at both ends ... has 1/4" more travel to the bumpstop and 1/2" more piston travel ... that should get me a bit more travel at the axle ... the 400ex has about 1" of preload adjustment, the Fox has 3 1/4", that's what caught my intrest in this shock ... with a small mod to the spring separator and bottom retainer I can run the ex spring along with the small secondary spring on the Fox body ... it has a smaller wire dia. and is more suited to the light Blaster ... hopefully I'll use most of the travel I gain in sag ... I believe a shock needs to work both ways, not ride at the top of it's travel ... I like the way this shock is built, complete rebuild kits are available for around $25 and a variety of valve disks are available for the valving stacks so it can be fine tuned by me


Last edited:
Thanks man, the inside mount was for bolt clearance. Now I can set up long travel for the dunes & shorten/tighten it up for log roads
any chance you can use a quick release pin for on the trail adjustment...prob not stable/strong enough for suspention
any chance you can use a quick release pin for on the trail adjustment...prob not stable/strong enough for suspention
Can't see myself changing the mount location on the trail but I don't see why not as long as there's clearance for whatever type of keeper you use... never really liked the small, soft contact area on the aluminum shock yoke but since the bolt doesn't actually pinch it I don't see why a pin wouldn't work just as well ... I just had the right size bolt & nut in the junk box
When extending or building a swing arm ya want the axle parallel to the pivot bolt. Ya don't want the arm twisted ... do you? ... I have no truly flat large surface or fancy laser measuring tools ...  ... don't know bout experts but when I weld, things change ... if I keep checking I can work it back where it belongs before it gets to weird ... here's a simple method I used when setting up the jig, after tacking up the arm, after long welds and to fine tune after final welding.
I clamped a piece of string to the top of the pivot bolt on the jig ( can use the endcaps to clear the swingarm after assembly starts) ... held the bottom string to the wide flair before the splines on one end of the axle and lowered the top string to the corresponding spot on the other end of the axle ... where the strings cross the top string should deflect the bottom string about 1/2 the string dia. ... check by putting the bottom string on top & top to bottom. assuming your axle is parallel to the pivot bolt this should be true enough for any ATV swingarm ... burp
I clamped a piece of string to the top of the pivot bolt on the jig ( can use the endcaps to clear the swingarm after assembly starts) ... held the bottom string to the wide flair before the splines on one end of the axle and lowered the top string to the corresponding spot on the other end of the axle ... where the strings cross the top string should deflect the bottom string about 1/2 the string dia. ... check by putting the bottom string on top & top to bottom. assuming your axle is parallel to the pivot bolt this should be true enough for any ATV swingarm ... burp
Last edited by a moderator:
looks like what SMS? used to sell.
should work out fine, I'd only be afraid of that zerk maybe wearing into your boot, or making a good dent in it if you were to wreck
Think it will be protected by the Amp chain roller on the YZ Blaster but I prolly better countersink the one on the guest Blaster.
looks like what SMS? used to sell.
should work out fine, I'd only be afraid of that zerk maybe wearing into your boot, or making a good dent in it if you were to wreck
Thanks for the feedback ... this should be OK considering the location on the frame
~
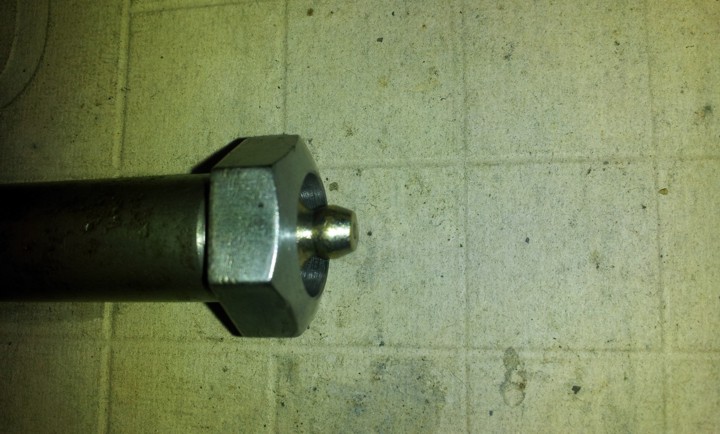
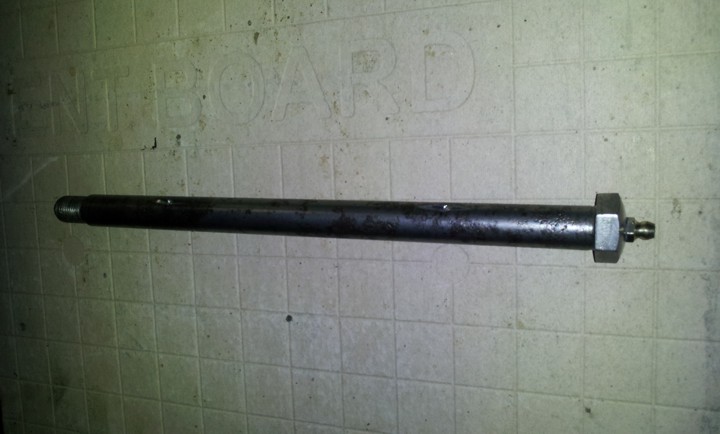
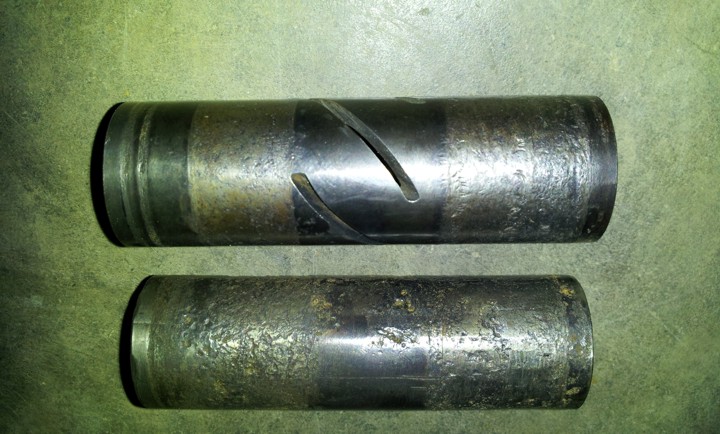
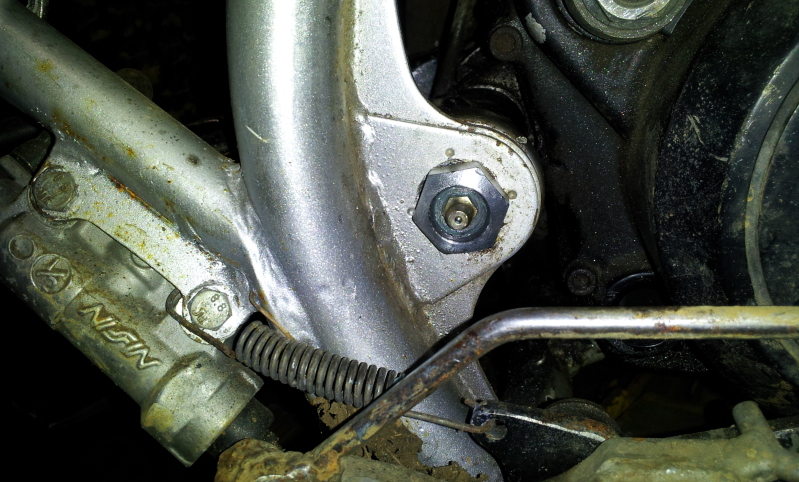
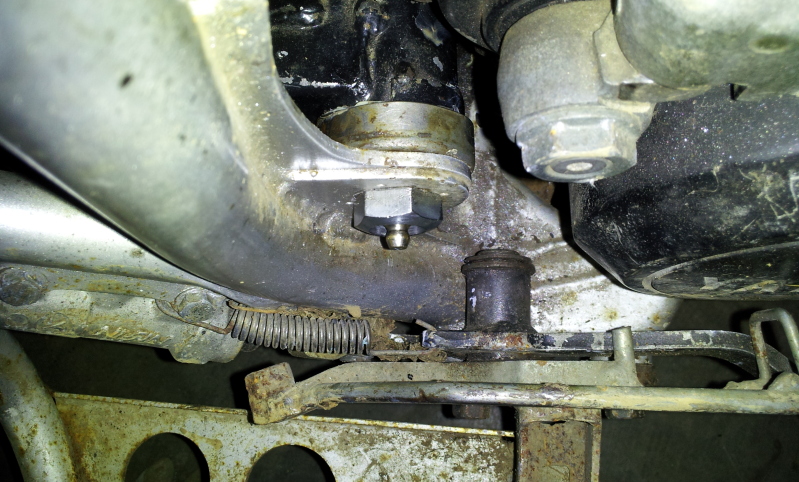
Since we had the swing arm off the guest Blaster to measure new swing arm ideas we decided to install the grease zerk pivot bolt and try a Fox spring on the 400ex shock. The Grease bolt seems to work like it should. Nice hearing the crackle of little air bubbles being purged from the tubes/bearings. Here's a pic of the other part of that mod. I didn't take any pics of the installed sleeve so I ground sum holes in an old dead one to show what I did. Nothin fancy, just a way for the grease to get from the bolt to the bearings. I've rusted up a lot of bearings without zerks 
~
~
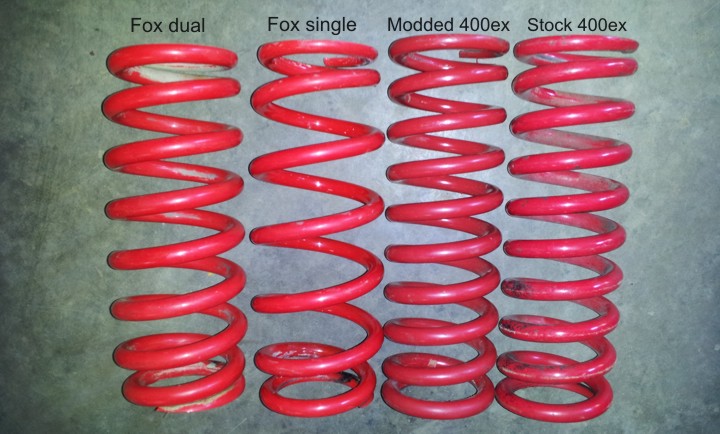
Been gathering up test springs when I can. The pic below shows a Fox Dual action lower spring, A Fox single spring that replaced the dual springs in newer models, a 400ex spring I taper ground to make it progressive and a stock 400ex spring. All these springs are about the same length. We installed the Fox single action spring on the guest Blaster. The larger diameter spring hit the front swingarm cross member on the longest travel mount hole so I had to use the next set of holes, still good travel but not max. Tested it most of the day and it seems to be the best rear setup we've tried yet. Below is a short vid that shows the sag & ride height with a 170lb rider. We've done no pre-load, compression or rebound adjusting yet ... just enjoyed riding
~
~
~


~
Been gathering up test springs when I can. The pic below shows a Fox Dual action lower spring, A Fox single spring that replaced the dual springs in newer models, a 400ex spring I taper ground to make it progressive and a stock 400ex spring. All these springs are about the same length. We installed the Fox single action spring on the guest Blaster. The larger diameter spring hit the front swingarm cross member on the longest travel mount hole so I had to use the next set of holes, still good travel but not max. Tested it most of the day and it seems to be the best rear setup we've tried yet. Below is a short vid that shows the sag & ride height with a 170lb rider. We've done no pre-load, compression or rebound adjusting yet ... just enjoyed riding
~

~
Last edited by a moderator:
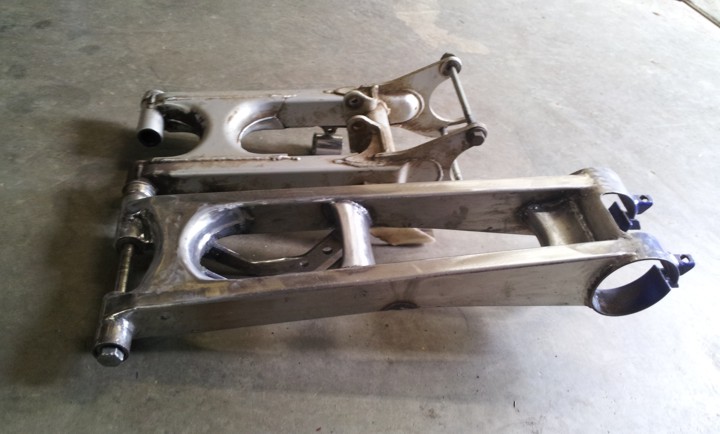
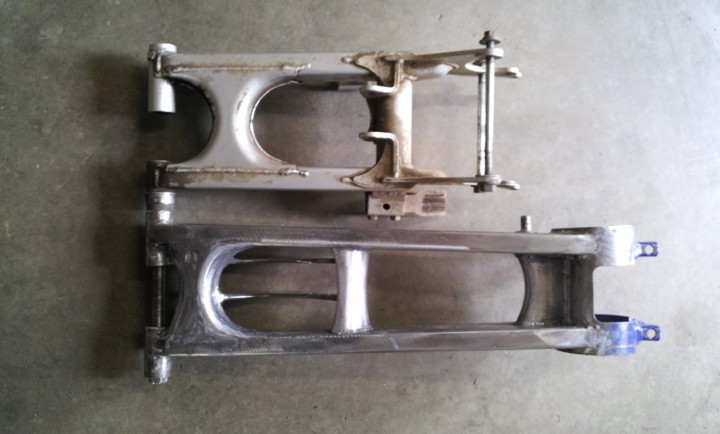
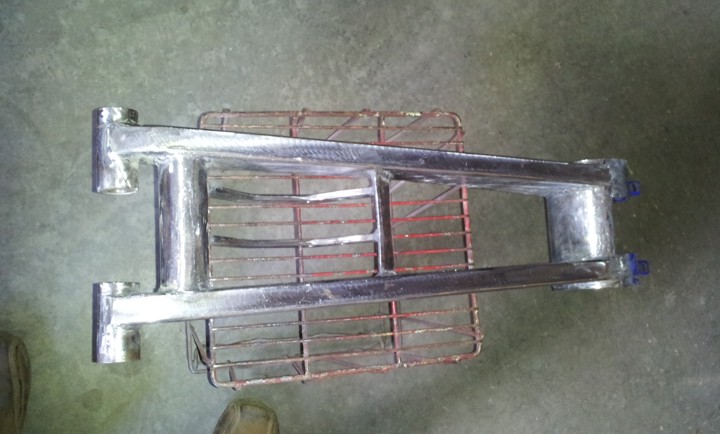
Been saving for a long time and trying to do a decent job on this swingarm so I could have Oregondunes chrome it for me ...
~
~
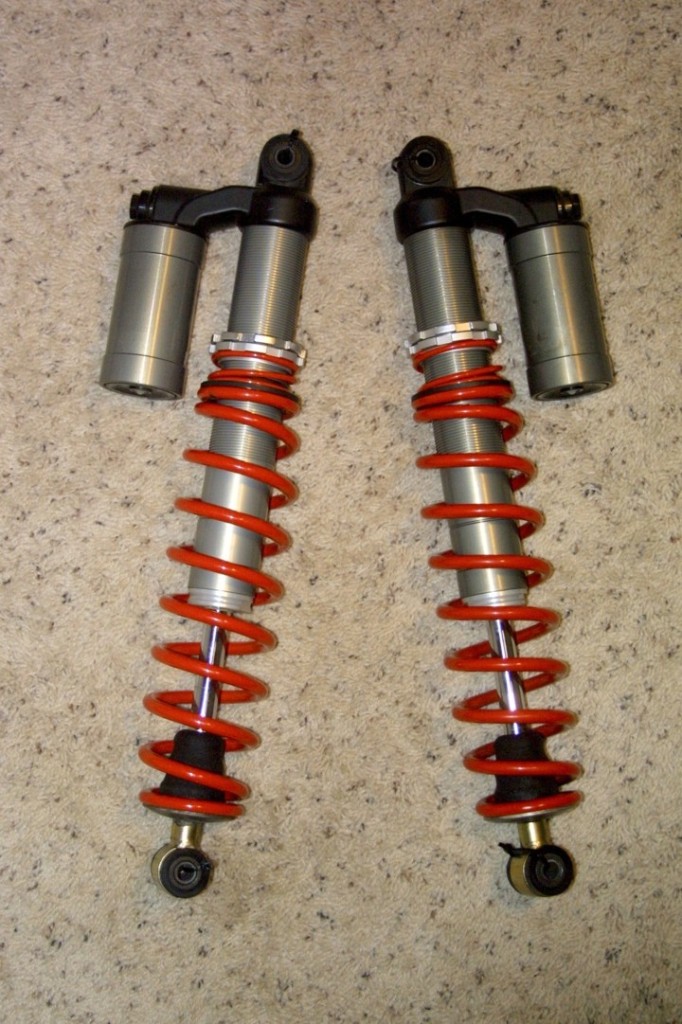
But ... I saw these shocks I've been watching for and pushed the buy it now button. I really thought I deserved some bling but I think these shocks are just what I need to complete the front suspension ... Less than an hour ride time ... can't wait to test these things ... not for most Blasters at 17.7 inches ... the swing arm will prolly have to get by with paint for awhile ... always compromises
~
~


~
But ... I saw these shocks I've been watching for and pushed the buy it now button. I really thought I deserved some bling but I think these shocks are just what I need to complete the front suspension ... Less than an hour ride time ... can't wait to test these things ... not for most Blasters at 17.7 inches ... the swing arm will prolly have to get by with paint for awhile ... always compromises
~

more pics please!!!!
OK, sum pics ...
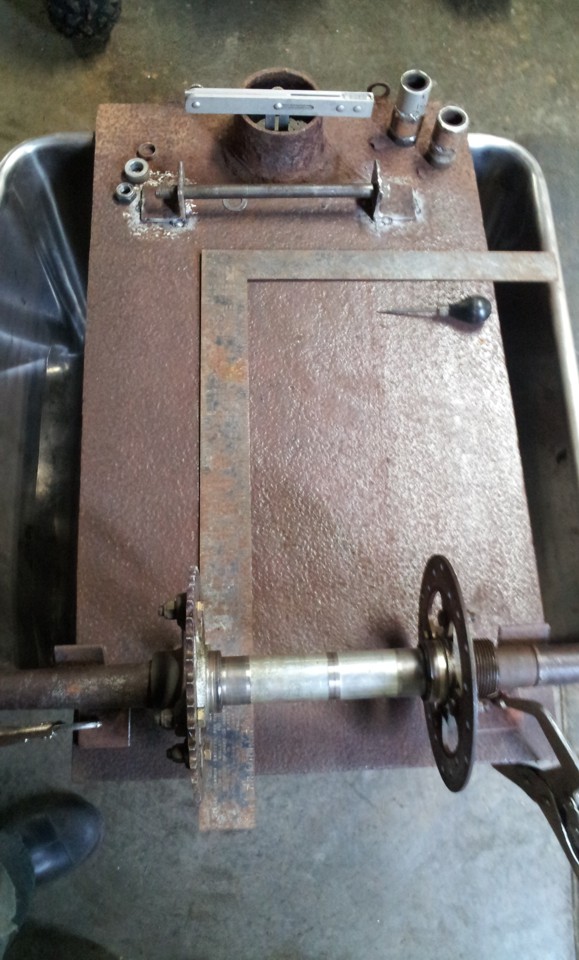
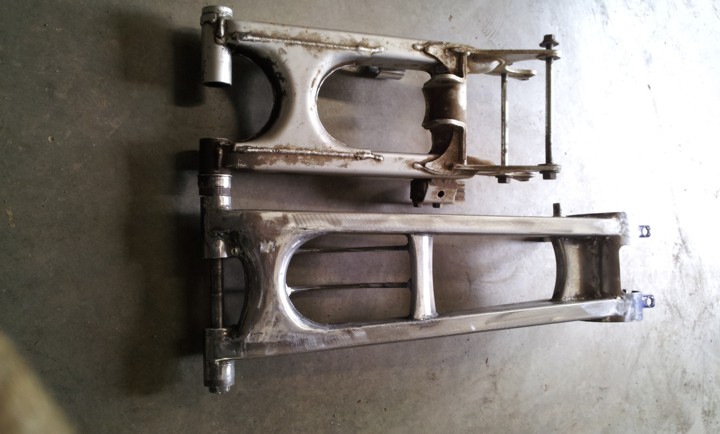
This is mostly a buncha scrap, sometimes referred to as a homebrew swinger ... it's a + 4 1/2" cuz I like 4" and I'm moving the front spindles back 1/2" ... the shock mount will accept a 400ex shock in a location I know to be good ... or the Fox shock shown earlier in this thread for even more travel. The rails are mounted high on the pivot tubes & carrier clamp for the 400ex mount bolt clearance and cuz it looks weird.
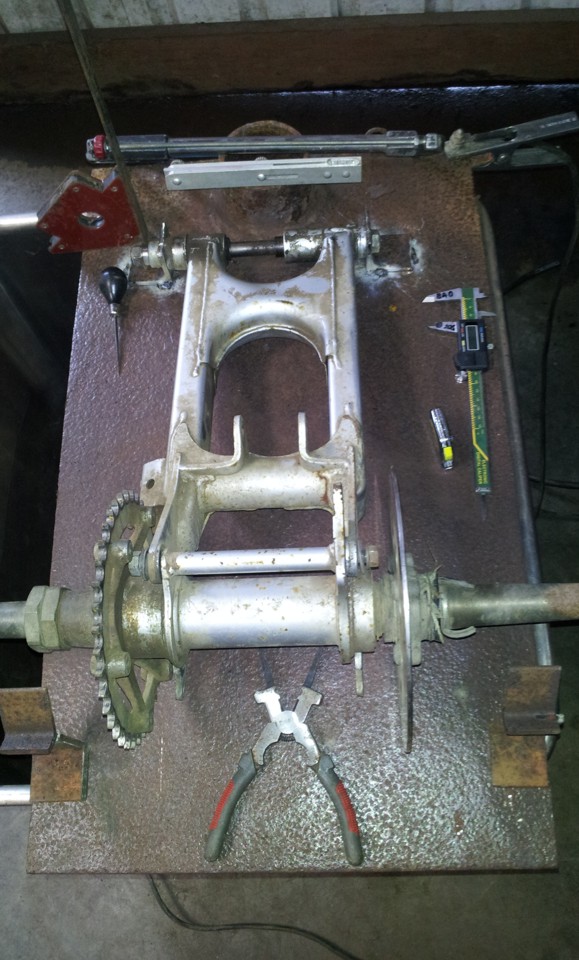
I made a fixture on an old steel plate laying out important locations in relation to the pivot bolt. I roughed in a couple holders for the axle at +4 1/2" and kinda filled in the rest ... no boring math or formulas here ... just kept things true & in the right relationship to the pivot bolt plus a little drinkin thinkin
~
~
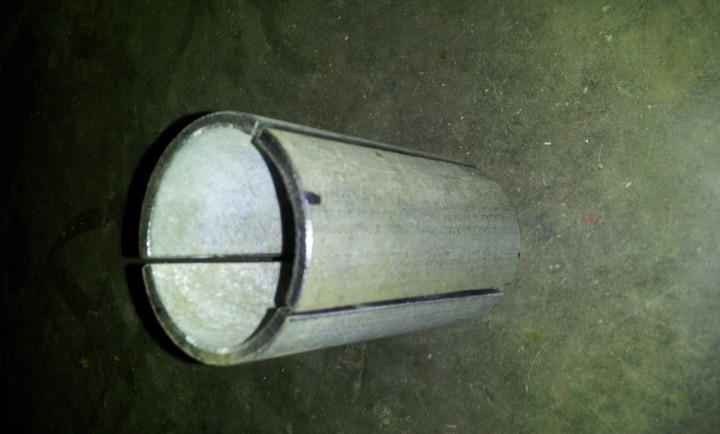
Made some inserts for the pivot tubes to imitate bearings and hopefully keep the tubes from deforming too much when welding
~

~
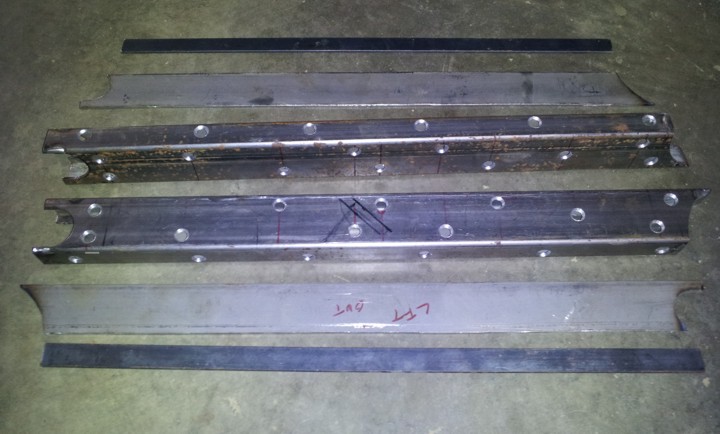
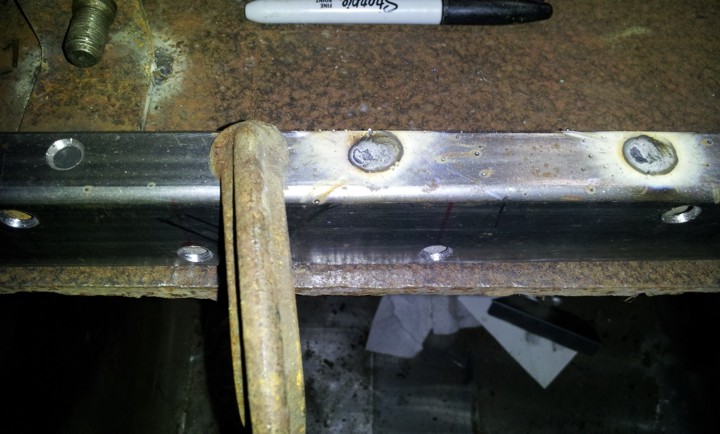
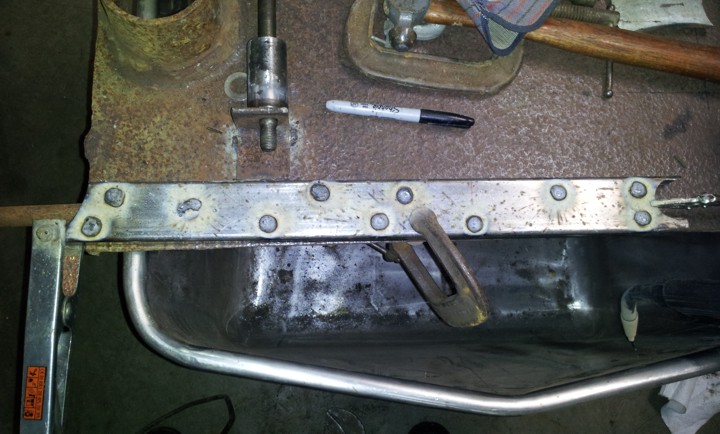
beefed it up a bit by adding some material inside ... trying to avoid cracks in the heat affected areas that sometimes show up on swingarm shop arms ... wanted it to be strong without looking bulky, one of my primary goals
~
~
indulged myself in some old school woodworking skills just for the fun of it ... mortise & tenon, baby ... LOL
~
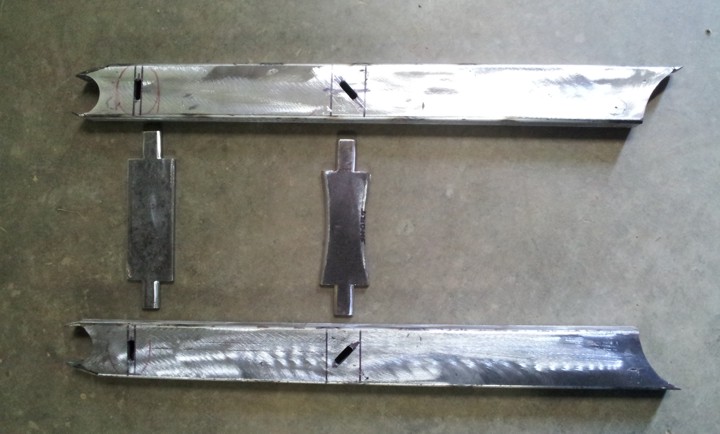
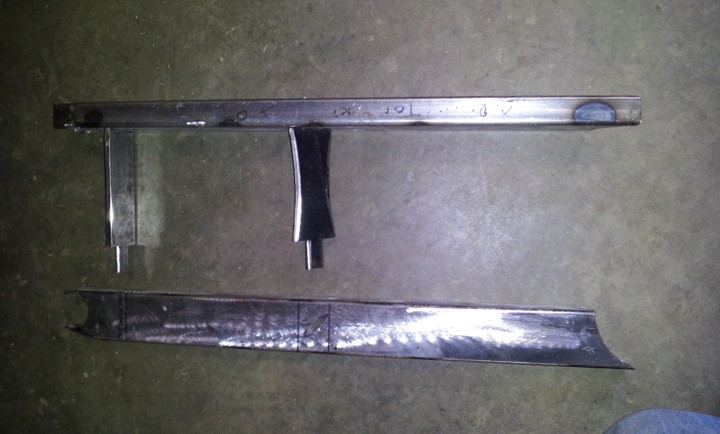
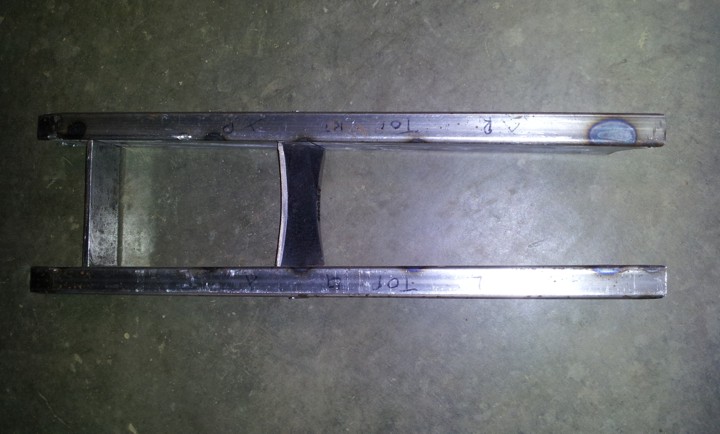
ooops too many pics for one post !
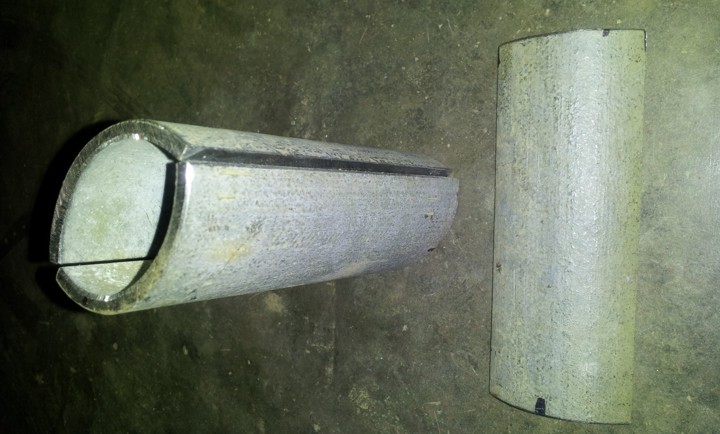
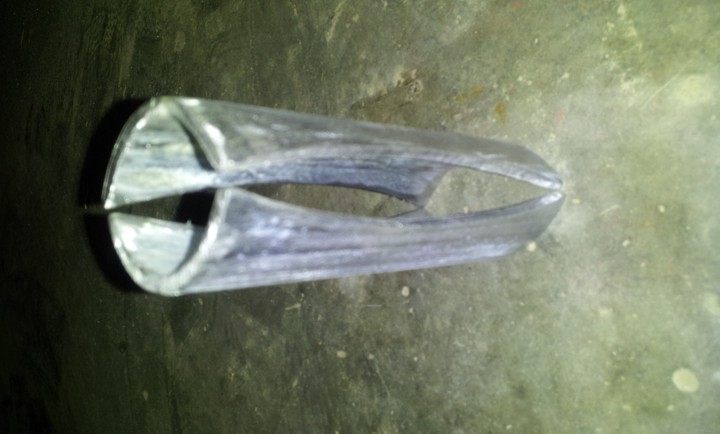
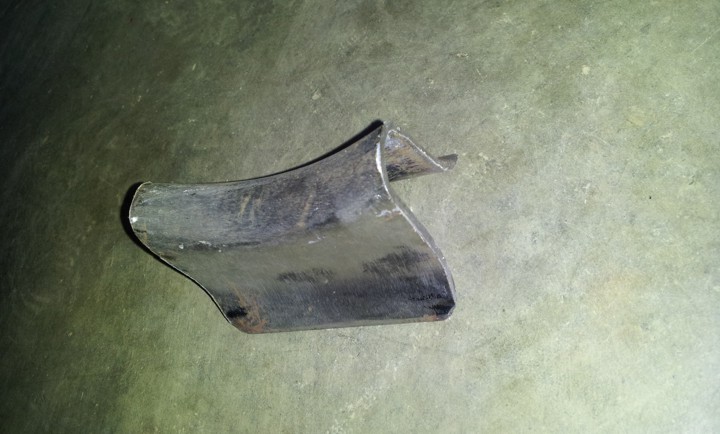
more bent up scrap
~

~
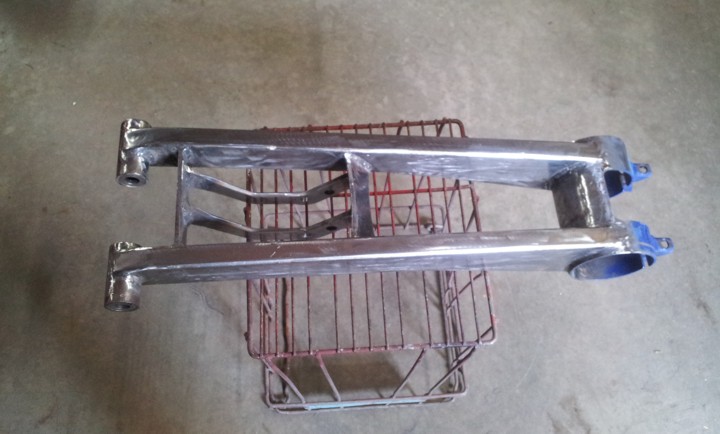
added carefully located shock mounts and reenforced the front 1/4" plate crossmember with a tube then added the Blaster shell for a little extra strength and some character ... reenforced the rear crossmember with the formed pipe pieces
~
~
still needs a lot of cleanup but the fun stuff is mostly done ... burp
~


~
added carefully located shock mounts and reenforced the front 1/4" plate crossmember with a tube then added the Blaster shell for a little extra strength and some character ... reenforced the rear crossmember with the formed pipe pieces
~


~
still needs a lot of cleanup but the fun stuff is mostly done ... burp
Similar threads
- Replies
- 3
- Views
- 2K
- Replies
- 14
- Views
- 2K

