Ok, so we've all probably been there... You go to turn on the gas to the Blasty, and all of a sudden it starts spilling out of the carbuetor, either through a vent tube or the intake. Here's a little-known trick to solve the problem, using only materials found in the bathroom. Read on, this takes about 10 mins and costs almost nothing! Oh, and for all the cynics out there who can't understand why you don't just go out and buy a carburetor kit for $ 15.00 that comes with a whole new needle and seat? Relax.
$ 15.00 buys a lot of double cheesburgers and Cokes, and why go buy parts you don't need? Plus, it is way too easy for inexperienced riders to accidentally install the stock jets which come in most carb kits, thereby undoing lots of time spent jetting the bike in the first place. Oh, and how many people carry a spare carb kit in their back pocket while out on the trails? Didn't think so. If you're a camper such as myself who cares at least some about hygene, you need look no further than the personal care bag in the truck for some toothpaste and a couple Q-tips...
To do this DIY, you will need said leaky carburetor, a couple shop rags, a good clean work surface, a can of carb cleaner, a couple cotton swabs (Q-tips), and a tube of paste-type toothpaste. :-/ Yup, just trust me. This little-known trick works wonders!
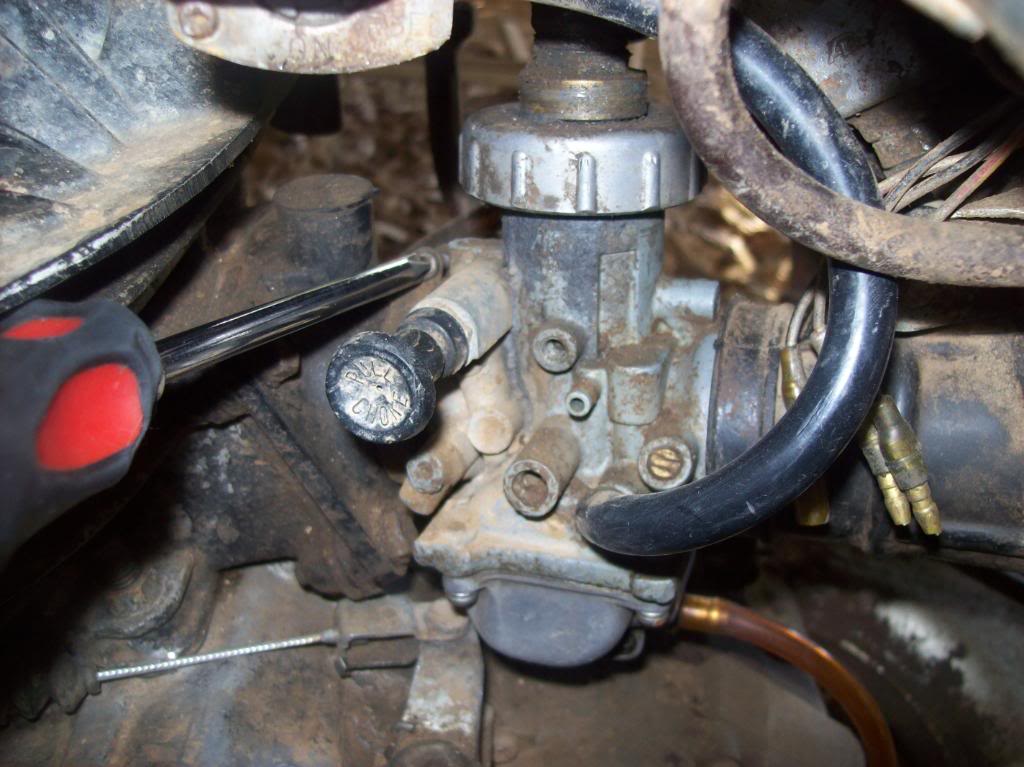
First, get the offending carburetor off the Blaster. It helps to open the bowl drain screw before taking the carb off to avoid spilling even more gas out.
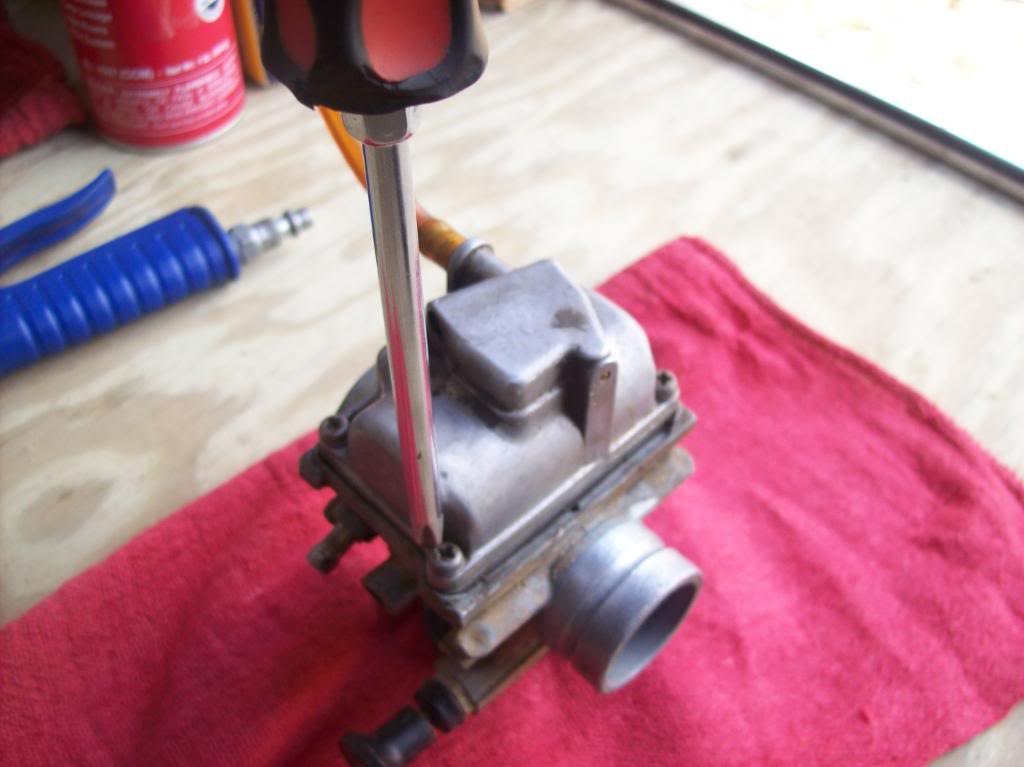
Take the carb, invert it on your workbench, and take the bowl off. Remove the main jet splash shield and set it all aside. Watch out for gas which may be left in the bowl. Rags help here.
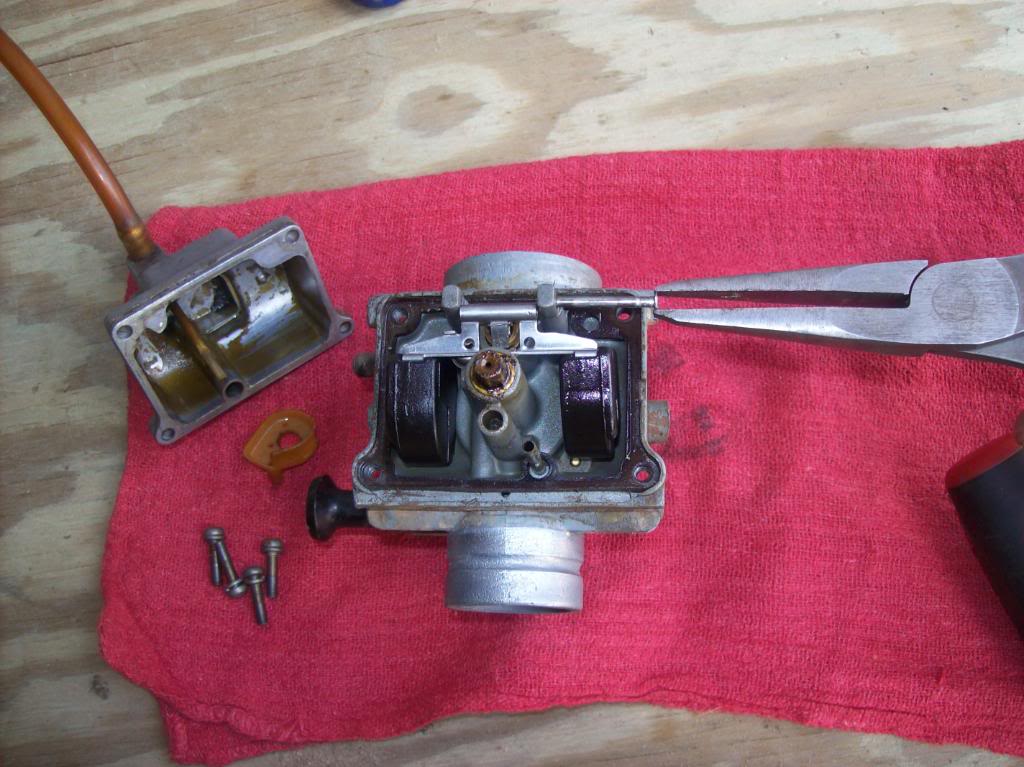
Next, remove the pin holding the float in place with a pair or long-nose pliers or a small roll pin punch. Be VERY CAREFUL with the punch so that you don't break one of the float pin-holding 'ears' off the carb. Take the float off and look it over carefully. Shake it. If you see any pinholes or hear gas sloshing around inside the float, it is no good and will have to be replaced. The carburetor you are working on is a Float Carburetor. Not a Sink Carbuetor.
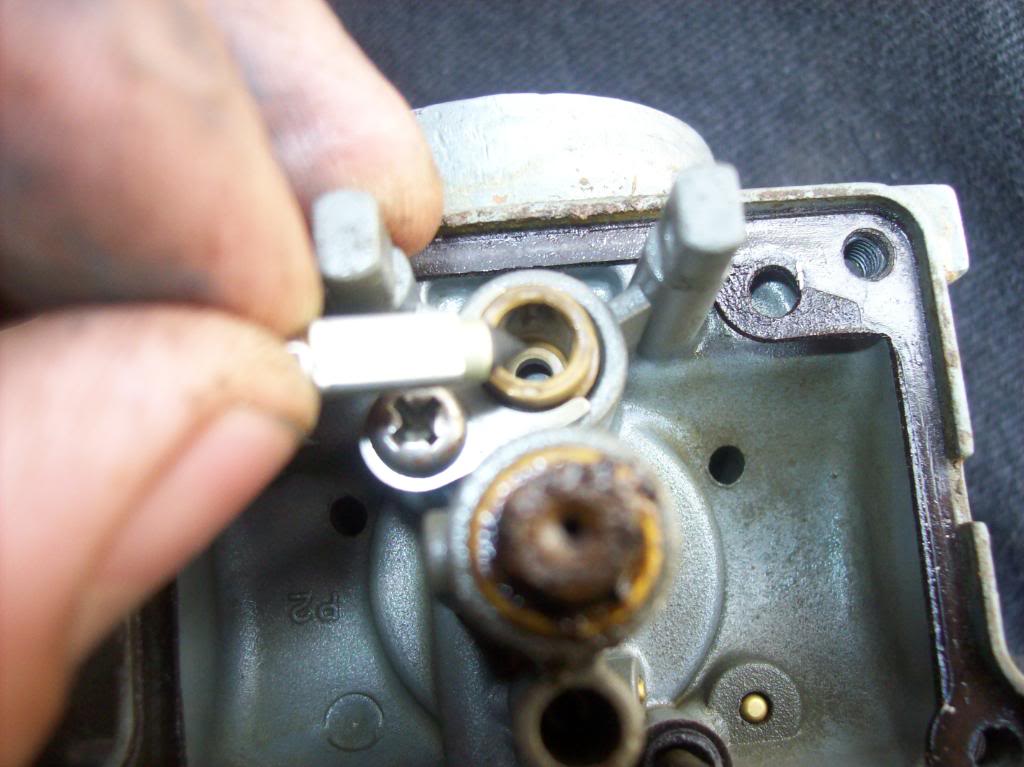
Float OK? Good. Set it aside and look at the needle. This needle has a rubber tip which works in combination with the brass seat bolted inside the carburetor to shut off the fuel flow to the carburetor when the bowl becomes full. If the needle becomes damaged or debris gets between the needle and the seat, the needle can't do its job and you get a flooding problem.
Look carefully at the rubber tip on the needle. If it is bent, badly grooved, or noticibly damaged, you will need to replace the needle. A small amount of deposits can be cleaned off as instructed later.
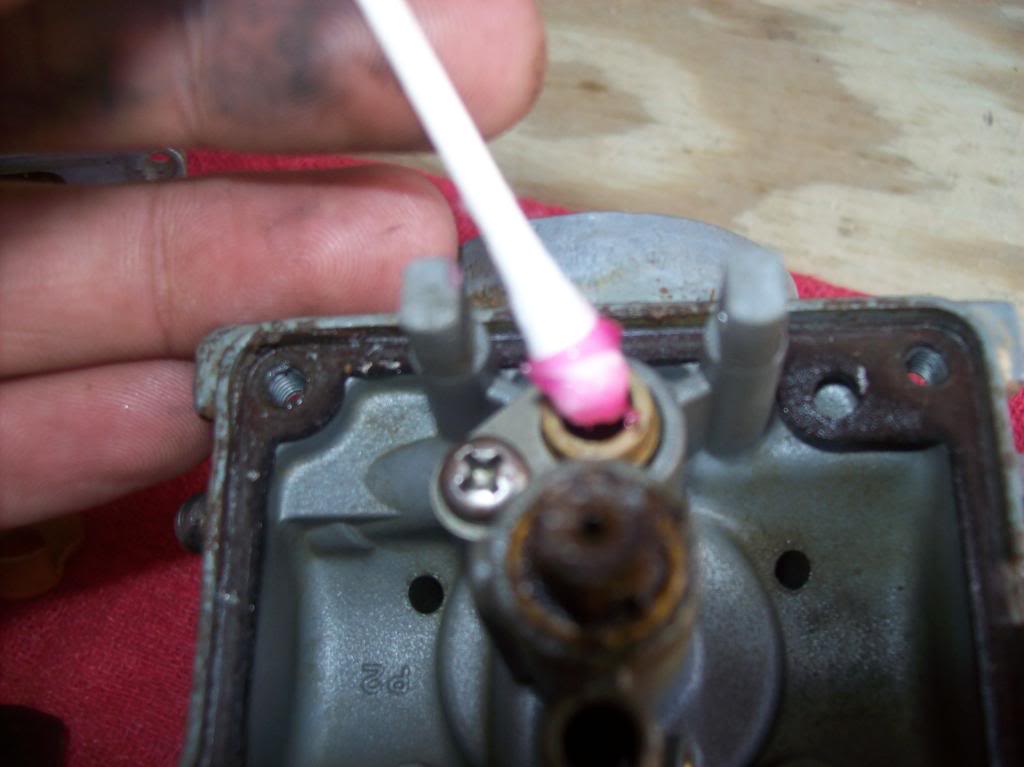
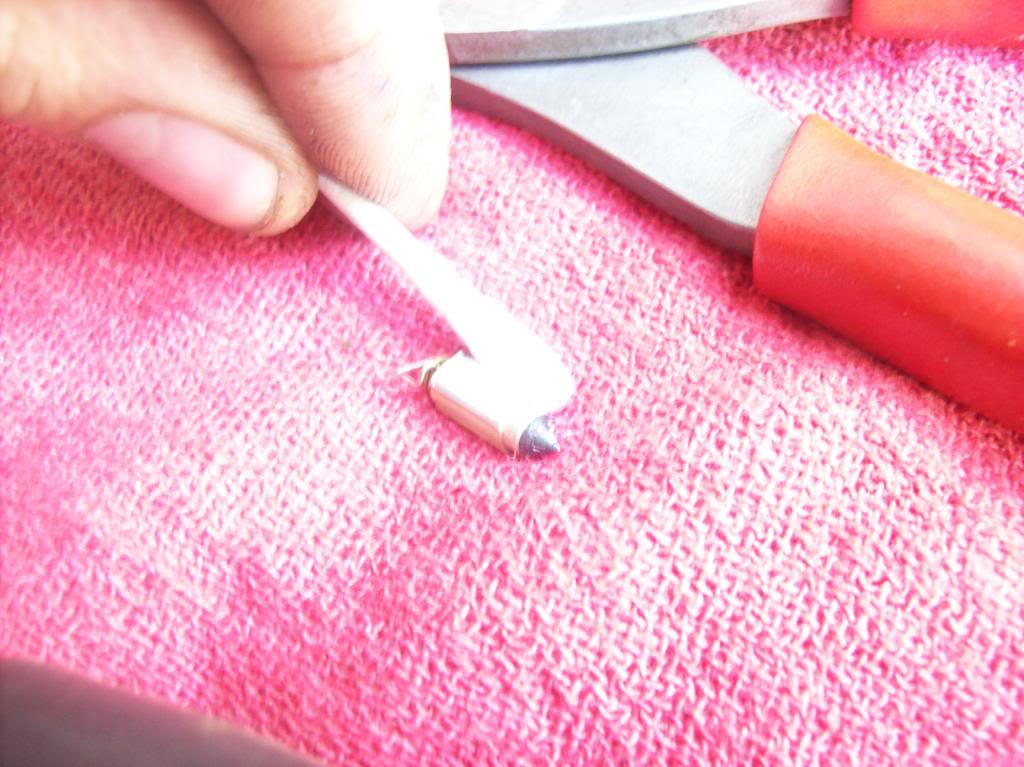
Now, take a cotton swab and put a small amount of toothpaste on it. Slide the swab into the seat and work it for about 30 seconds.
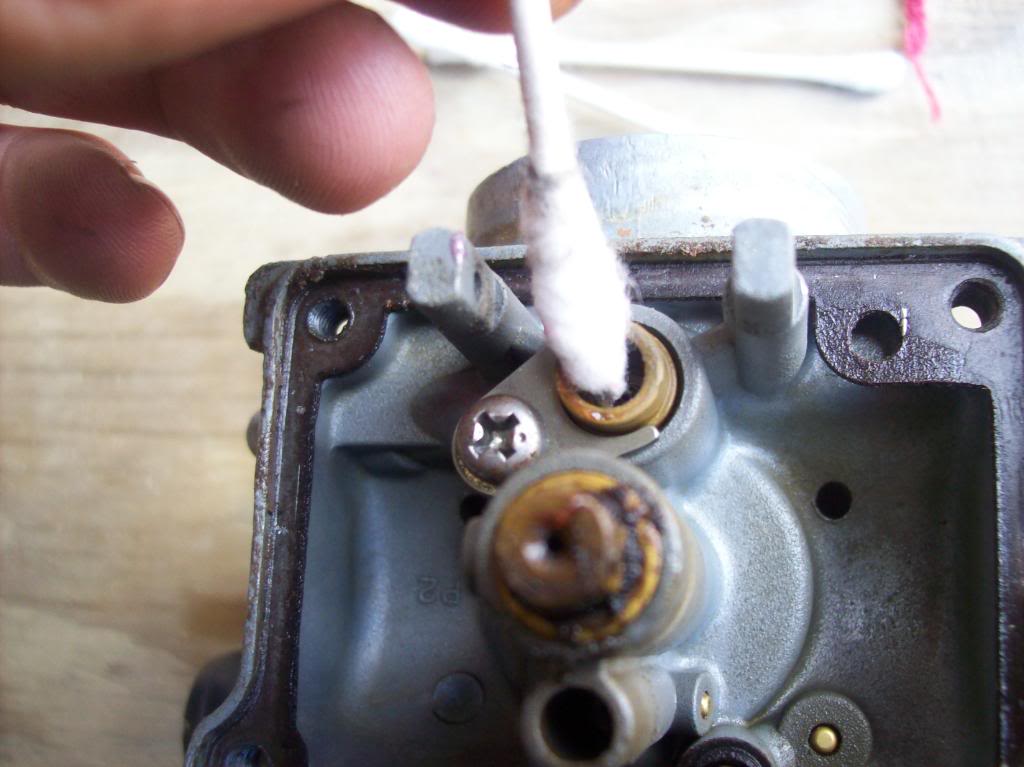
Pull out the swab, turn it over, and use the other end to do the same.
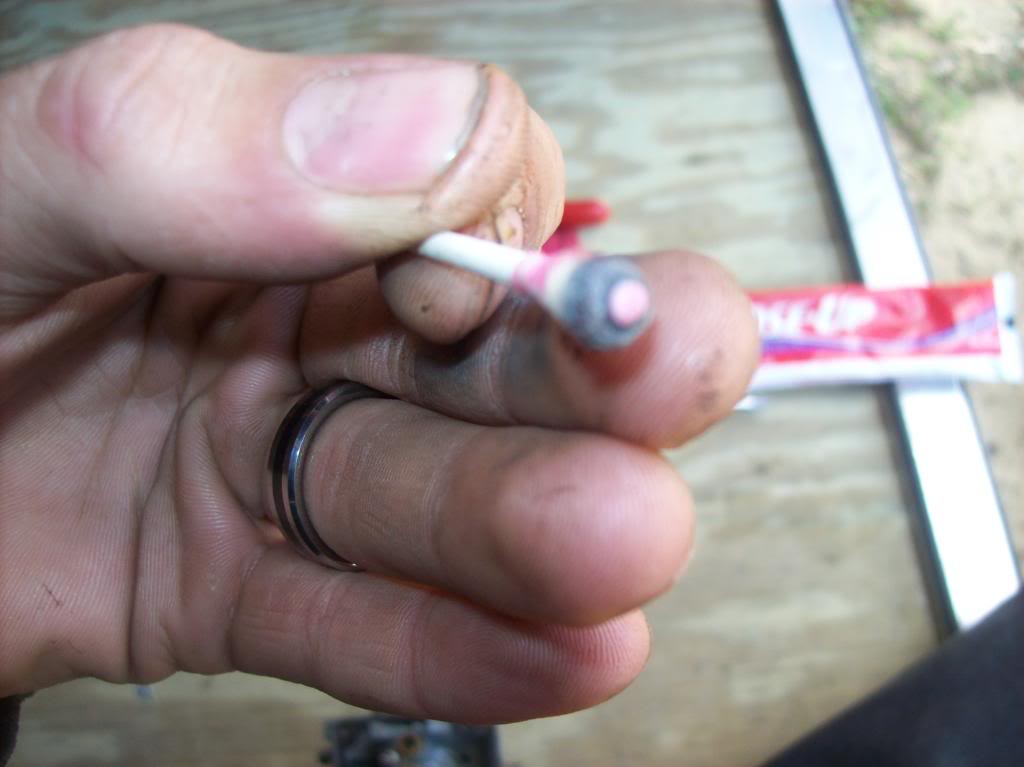
By now, you will probably see that the swab has turned black where it touched the seat. There's all the deposits which were encrusting the seat cleaned off! Some carbs are so bad that even a new needle wouldn't seal against a dirty seat.
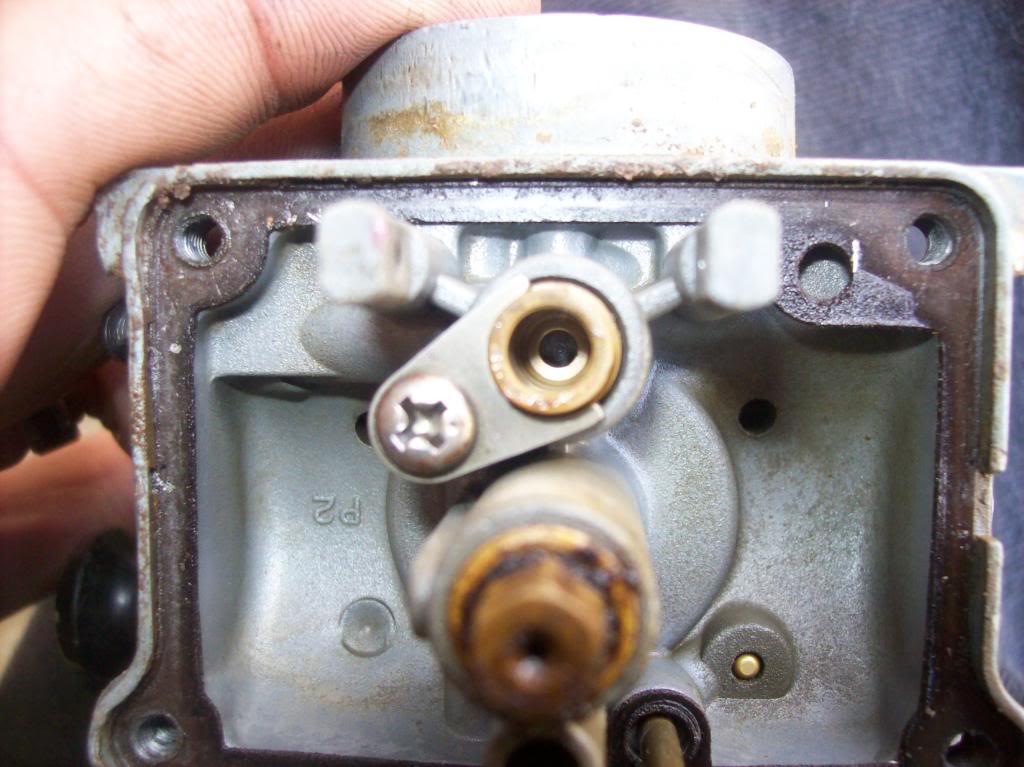
Once you have the seat clean, it will be shiny clean and look something like this. Do the toothpaste swab again if needed, until it is nice and polished.
Now, if your needle isn't totally shot, do the same thing to the rubber tip of the needle. Get it clean, and don't forget to get all the toothpaste out of the carbuetor before putting it back together.
Next? Simply clean out the remainder of the carb with aerosol cleaner as needed and put it back together. Be sure to check the bowl gasket before reassembly, as a stale or damaged bowl gasket will result in a fuel leak around the bowl. Usually more of a drip than a gush, but I've seen some carbs with bad bowl gaskets take a rather nice pee.
With the carb back together, simply put it back on the Blasty, turn on the fuel, and ride away leak-free! I can't 100% guarantee that this will work on EVERY carb, but this trick has worked well for me and has put an end to many headaches. It is also very handy to know when working on carbs with pressed-in seats that can't be easily replaced. I recently rebuilt the carb on a Honda Recon for a neighbor, and his carb wouldn't quit spewing fuel until I broke out the Colgate. In the case of that carburetor, you would have to buy a whole new one if you wanted to replace the seat.
Also, I LOVE doing the toothpaste treatment to troublesome carbs on riding lawn mowers. Newer Kohler and Briggs and Stratton 25-, 28-, 30-, and 33,000 model series engines, especially, seem to suffer from incessant flooding problems. On them, the carb usually leaks during storage and fills the whole engine up with gas. Here's a quick cure for those carbs, too, without having to go out and pay $ 100.00 or more for a new one, even after you've put in a new needle and it still doesn't solve the problem.
$ 15.00 buys a lot of double cheesburgers and Cokes, and why go buy parts you don't need? Plus, it is way too easy for inexperienced riders to accidentally install the stock jets which come in most carb kits, thereby undoing lots of time spent jetting the bike in the first place. Oh, and how many people carry a spare carb kit in their back pocket while out on the trails? Didn't think so. If you're a camper such as myself who cares at least some about hygene, you need look no further than the personal care bag in the truck for some toothpaste and a couple Q-tips...
To do this DIY, you will need said leaky carburetor, a couple shop rags, a good clean work surface, a can of carb cleaner, a couple cotton swabs (Q-tips), and a tube of paste-type toothpaste. :-/ Yup, just trust me. This little-known trick works wonders!
First, get the offending carburetor off the Blaster. It helps to open the bowl drain screw before taking the carb off to avoid spilling even more gas out.
Take the carb, invert it on your workbench, and take the bowl off. Remove the main jet splash shield and set it all aside. Watch out for gas which may be left in the bowl. Rags help here.
Next, remove the pin holding the float in place with a pair or long-nose pliers or a small roll pin punch. Be VERY CAREFUL with the punch so that you don't break one of the float pin-holding 'ears' off the carb. Take the float off and look it over carefully. Shake it. If you see any pinholes or hear gas sloshing around inside the float, it is no good and will have to be replaced. The carburetor you are working on is a Float Carburetor. Not a Sink Carbuetor.
Float OK? Good. Set it aside and look at the needle. This needle has a rubber tip which works in combination with the brass seat bolted inside the carburetor to shut off the fuel flow to the carburetor when the bowl becomes full. If the needle becomes damaged or debris gets between the needle and the seat, the needle can't do its job and you get a flooding problem.
Look carefully at the rubber tip on the needle. If it is bent, badly grooved, or noticibly damaged, you will need to replace the needle. A small amount of deposits can be cleaned off as instructed later.
Now, take a cotton swab and put a small amount of toothpaste on it. Slide the swab into the seat and work it for about 30 seconds.
Pull out the swab, turn it over, and use the other end to do the same.
By now, you will probably see that the swab has turned black where it touched the seat. There's all the deposits which were encrusting the seat cleaned off! Some carbs are so bad that even a new needle wouldn't seal against a dirty seat.
Once you have the seat clean, it will be shiny clean and look something like this. Do the toothpaste swab again if needed, until it is nice and polished.
Now, if your needle isn't totally shot, do the same thing to the rubber tip of the needle. Get it clean, and don't forget to get all the toothpaste out of the carbuetor before putting it back together.
Next? Simply clean out the remainder of the carb with aerosol cleaner as needed and put it back together. Be sure to check the bowl gasket before reassembly, as a stale or damaged bowl gasket will result in a fuel leak around the bowl. Usually more of a drip than a gush, but I've seen some carbs with bad bowl gaskets take a rather nice pee.
With the carb back together, simply put it back on the Blasty, turn on the fuel, and ride away leak-free! I can't 100% guarantee that this will work on EVERY carb, but this trick has worked well for me and has put an end to many headaches. It is also very handy to know when working on carbs with pressed-in seats that can't be easily replaced. I recently rebuilt the carb on a Honda Recon for a neighbor, and his carb wouldn't quit spewing fuel until I broke out the Colgate. In the case of that carburetor, you would have to buy a whole new one if you wanted to replace the seat.
Also, I LOVE doing the toothpaste treatment to troublesome carbs on riding lawn mowers. Newer Kohler and Briggs and Stratton 25-, 28-, 30-, and 33,000 model series engines, especially, seem to suffer from incessant flooding problems. On them, the carb usually leaks during storage and fills the whole engine up with gas. Here's a quick cure for those carbs, too, without having to go out and pay $ 100.00 or more for a new one, even after you've put in a new needle and it still doesn't solve the problem.
Last edited:

 Yup, I figured enough people have suffered from this problem that it was worth explaining in detail.
")