This is a write up on how to make a custom set of double wides with kick ups.
Tools needed:
2 sets of stock pegs
Jig saw w/18 tooth cobalt blade
Bench vice
Angle grinder of any size w/60 grit flap wheel
Dremal tool w/ cut off wheel
1/8" x 2" piece of flat steel
Red lock tite
Siphon sandblaster w/ 50lbs of '000' sand
Drill w/ 3/8" cobalt bit
8 3/8" bolts & nuts w/full threads
The steel, bolts and blades can be found at any hardware store.
When your getting the steel resist the urge to instead get that shiny piece of aluminum in the same size that will probably be next to it.
Aluminum is weak and a pain in the ass to cut because it clogs up the blade.
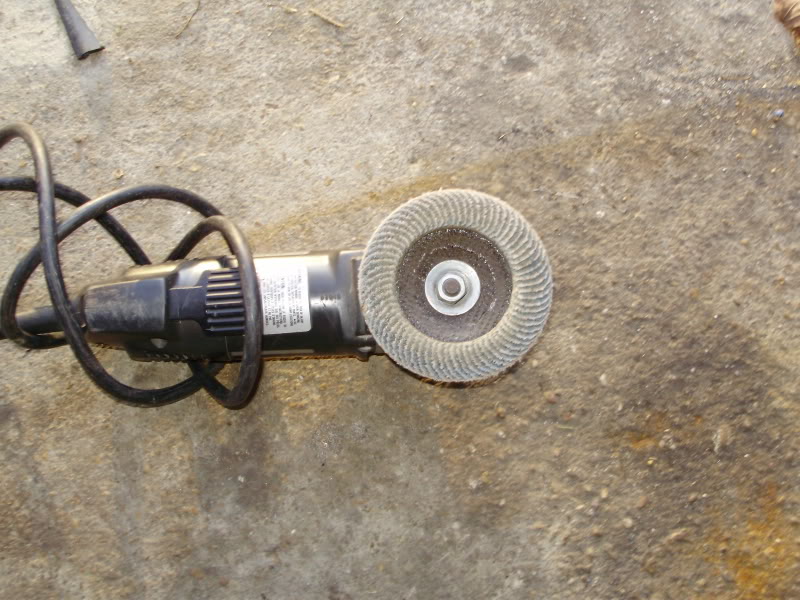
This is the piece of steel you need and some have asked me before what a flap wheel looks like so here ya go for that too.

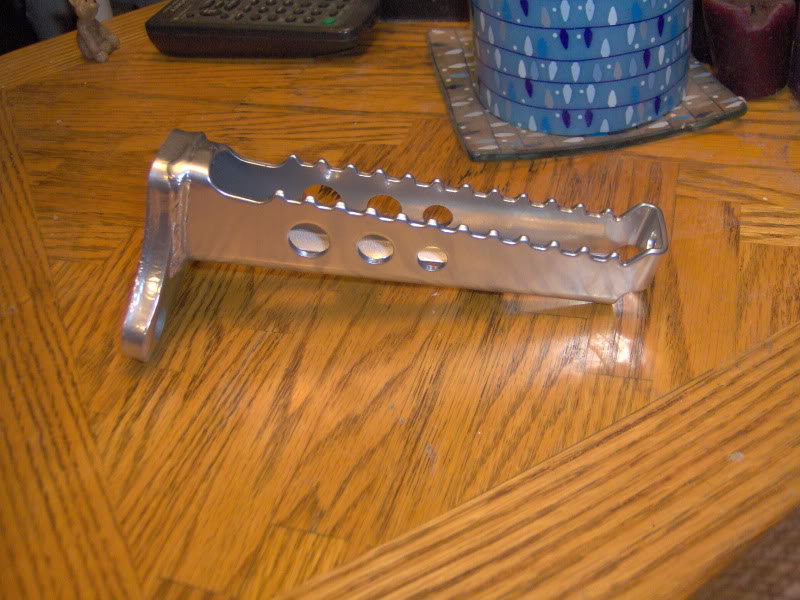
Start by mounting your spare set of pegs in a vice and using the jig saw to cut all the extra BS off of them. Obviously you only want the actual peg itself.
Cut slow and oil the blade or you will burn it up. You should only need one blade but if your new at cutting metal get the 2 pack of blades.
Bolt the 2 pegs together.
Now grab that steel and cut it the width of the 2 pegs. It's 2" tall which is more then you need.
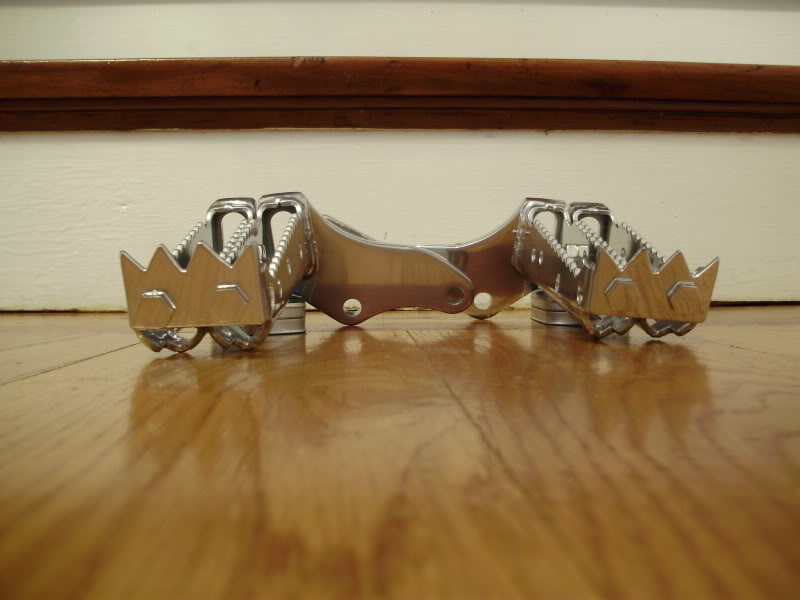
How high you want your kick ups to be as well as the amount/pattern of teeth on them is up to you.
Big teeth and less of them is easier then lots of little teeth.
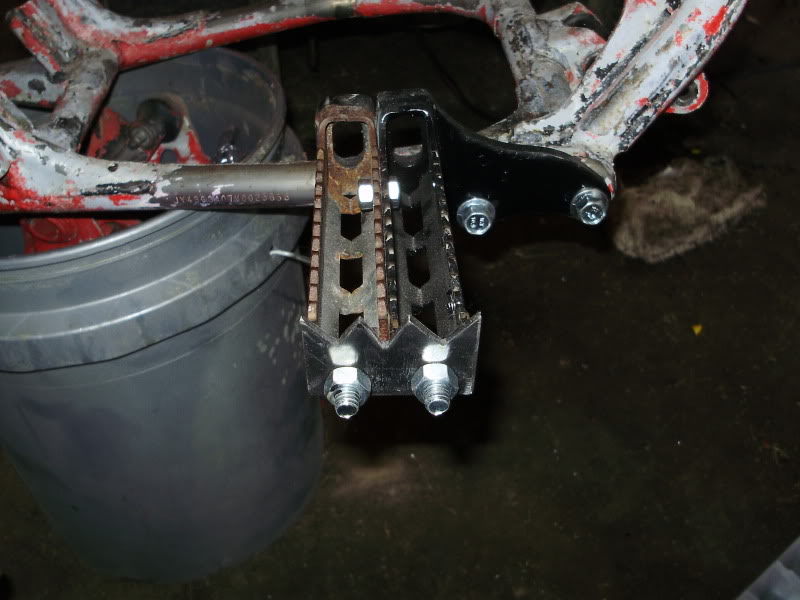
Yamaha has conveniently provided bolt holes on the front and the sides of their pegs for us but you will have to drill the ones on the kick ups yourself.
Vice them up and use a 3/8" cobalt drill bit, go slow and oil it.
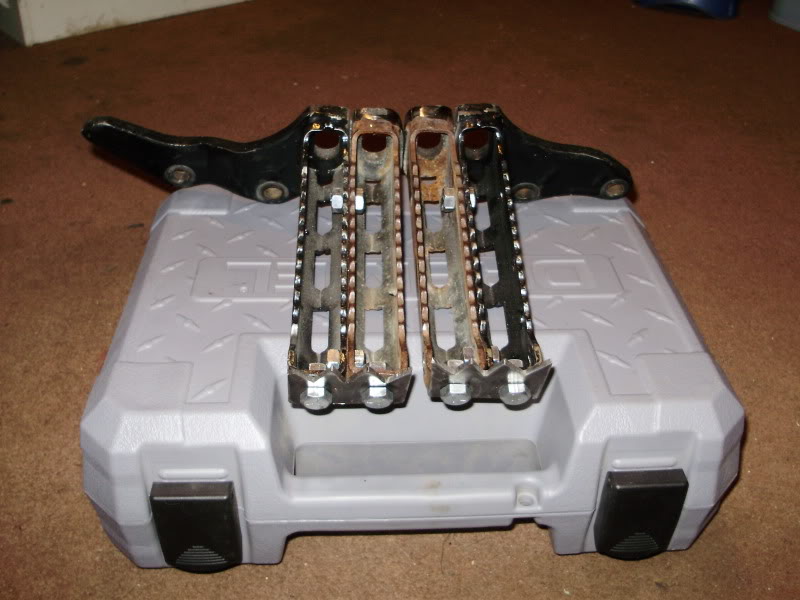
At this point they should look like this:
Grab your Dremal tool and cut off wheel and get to work on those excess bolt threads.
They are ugly and just add weight.
After they are cut I like to run the angle grinder on them to get rid of any burs, then I flip them around so the nuts are on the backside of the pegs.
RED LOCK TITE ALL OF THEM!
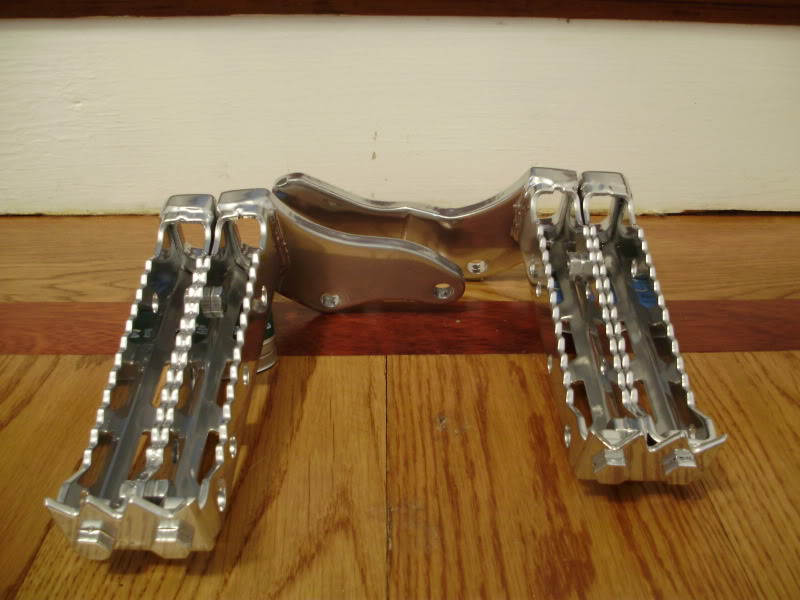
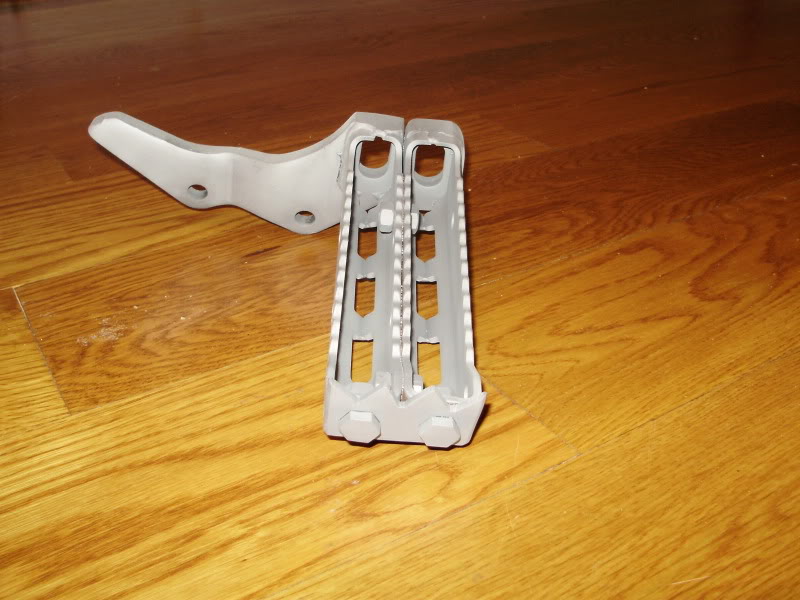
You will probably notice the tops of your pegs don't line up. No 2 are alike. I like to angle grind them down to be flush with each other, it just looks cleaner.
They are done for the most part but they are ugly as hell.
Don't cheap out and try to paint over the rust and what not.
Take some of that $200 you saved by not buying IMS pegs and get a Siphon sand Blaster and 50lbs of '000' sand.
It should cost less then $25 for the blaster and the sand.
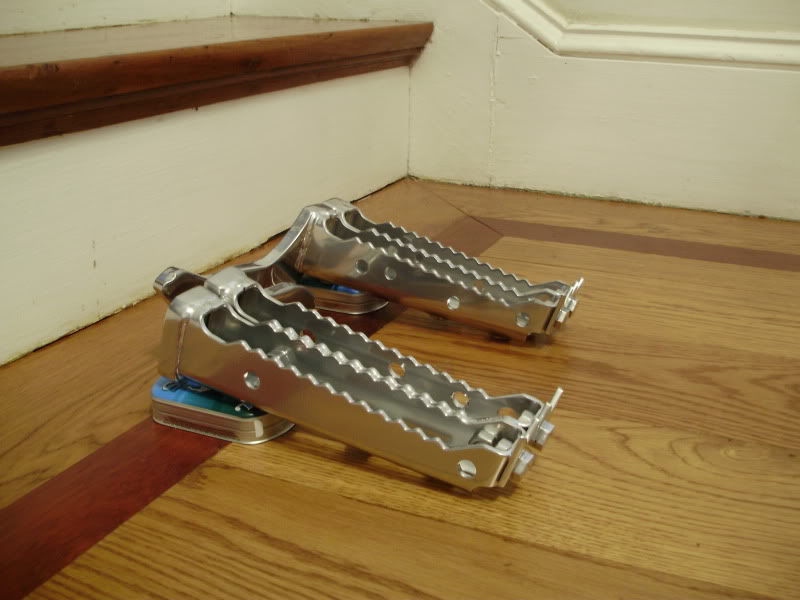
Wear a mask, gloves, goggles and blast away it should only take about 5 minutes for both pegs and look how clean they get.
Most of you will paint them which is fine. They might look clean after blasting but they are pretty dirty still.
Wipe them down with a wax, grease, oil remover. Not water- they will rust immediately.
If you have a propane torch go over them after your wipe down.
It will dry any residue and burn off any lint you left behind.
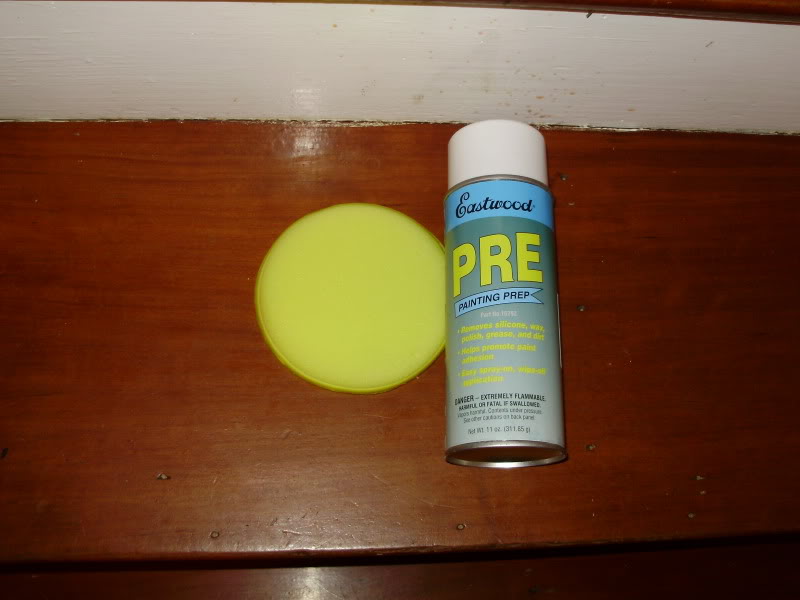
This is my favorite pre-paint/PC wipe down combo.
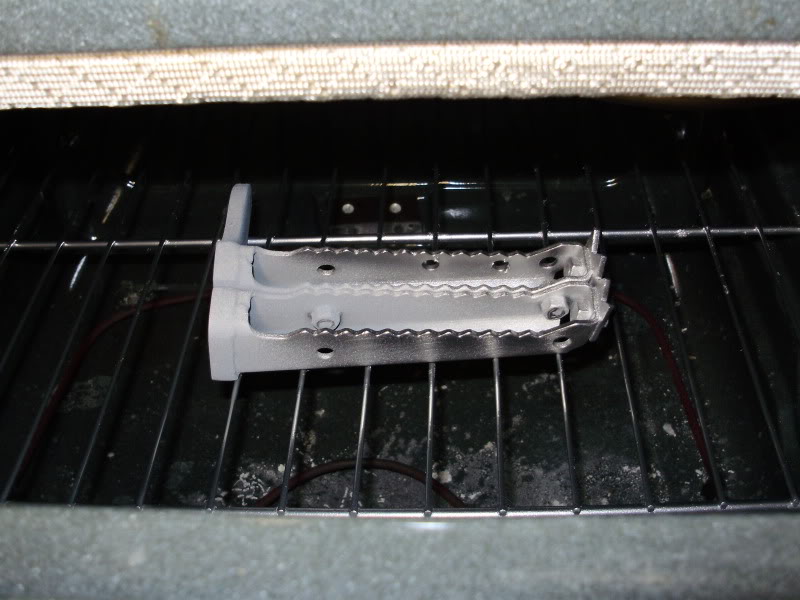
I choose to PC mine so here's a couple shots of that action.
Pegs are cooking and just beginning to 'flow out'.
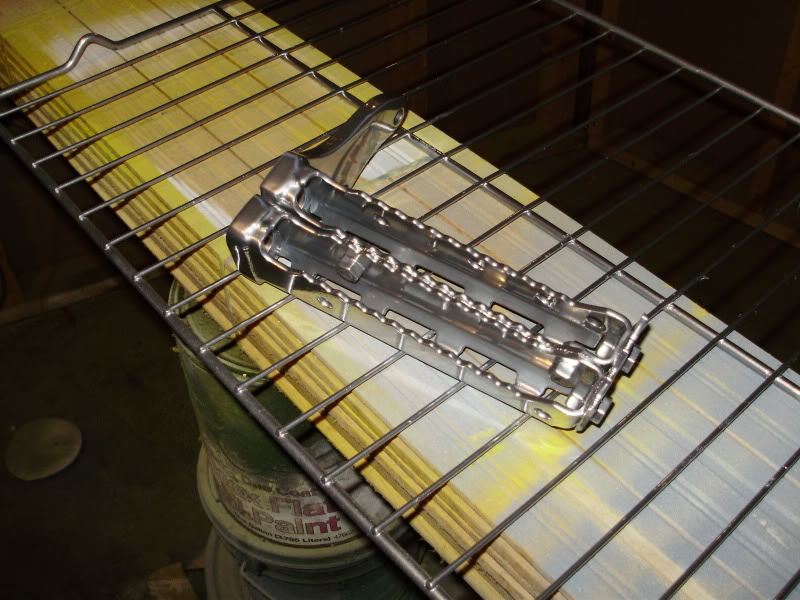
Fresh out the oven and cooling down.
Tools needed:
2 sets of stock pegs
Jig saw w/18 tooth cobalt blade
Bench vice
Angle grinder of any size w/60 grit flap wheel
Dremal tool w/ cut off wheel
1/8" x 2" piece of flat steel
Red lock tite
Siphon sandblaster w/ 50lbs of '000' sand
Drill w/ 3/8" cobalt bit
8 3/8" bolts & nuts w/full threads
The steel, bolts and blades can be found at any hardware store.
When your getting the steel resist the urge to instead get that shiny piece of aluminum in the same size that will probably be next to it.
Aluminum is weak and a pain in the ass to cut because it clogs up the blade.
This is the piece of steel you need and some have asked me before what a flap wheel looks like so here ya go for that too.
Start by mounting your spare set of pegs in a vice and using the jig saw to cut all the extra BS off of them. Obviously you only want the actual peg itself.
Cut slow and oil the blade or you will burn it up. You should only need one blade but if your new at cutting metal get the 2 pack of blades.
Bolt the 2 pegs together.
Now grab that steel and cut it the width of the 2 pegs. It's 2" tall which is more then you need.
How high you want your kick ups to be as well as the amount/pattern of teeth on them is up to you.
Big teeth and less of them is easier then lots of little teeth.
Yamaha has conveniently provided bolt holes on the front and the sides of their pegs for us but you will have to drill the ones on the kick ups yourself.
Vice them up and use a 3/8" cobalt drill bit, go slow and oil it.
At this point they should look like this:
Grab your Dremal tool and cut off wheel and get to work on those excess bolt threads.
They are ugly and just add weight.
After they are cut I like to run the angle grinder on them to get rid of any burs, then I flip them around so the nuts are on the backside of the pegs.
RED LOCK TITE ALL OF THEM!
You will probably notice the tops of your pegs don't line up. No 2 are alike. I like to angle grind them down to be flush with each other, it just looks cleaner.
They are done for the most part but they are ugly as hell.
Don't cheap out and try to paint over the rust and what not.
Take some of that $200 you saved by not buying IMS pegs and get a Siphon sand Blaster and 50lbs of '000' sand.
It should cost less then $25 for the blaster and the sand.
Wear a mask, gloves, goggles and blast away it should only take about 5 minutes for both pegs and look how clean they get.
Most of you will paint them which is fine. They might look clean after blasting but they are pretty dirty still.
Wipe them down with a wax, grease, oil remover. Not water- they will rust immediately.
If you have a propane torch go over them after your wipe down.
It will dry any residue and burn off any lint you left behind.
This is my favorite pre-paint/PC wipe down combo.
I choose to PC mine so here's a couple shots of that action.
Pegs are cooking and just beginning to 'flow out'.
Fresh out the oven and cooling down.
Last edited: